> ## Documentation Index
> Fetch the complete documentation index at: https://docs.userogue.com/llms.txt
> Use this file to discover all available pages before exploring further.
# Data Shelf Setup
> Setting up and managing data shelves
## Data Shelf Setup
All organizations are separately segmented, logically separated, and separately encrypted, this is for the absolute safety of your proprietary data. Which means you have to upload documents separately into each organization.
Adding documents to your data shelf is as simple as any document upload.
First, select the category of document you are uploading.
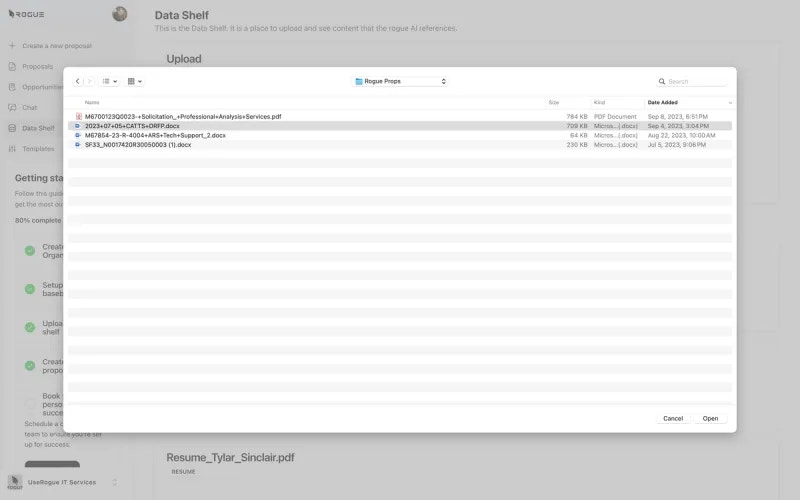
Then, select the "Choose File" field.
 Then navigate to the file structure location of the document and select "Submit"
 You can view all of your documents in one place in the data shelf, both those that you upload and those which you create in UseRogue.
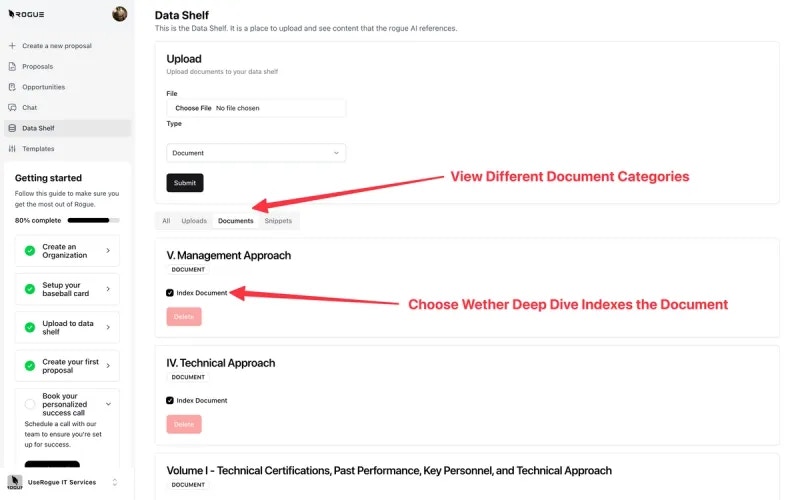 > Note, you can elect to include or exclude documents from indexing by selecting the check box. Indexing means that the AI will search through that document and potentially reuse it's contents in generating new content.
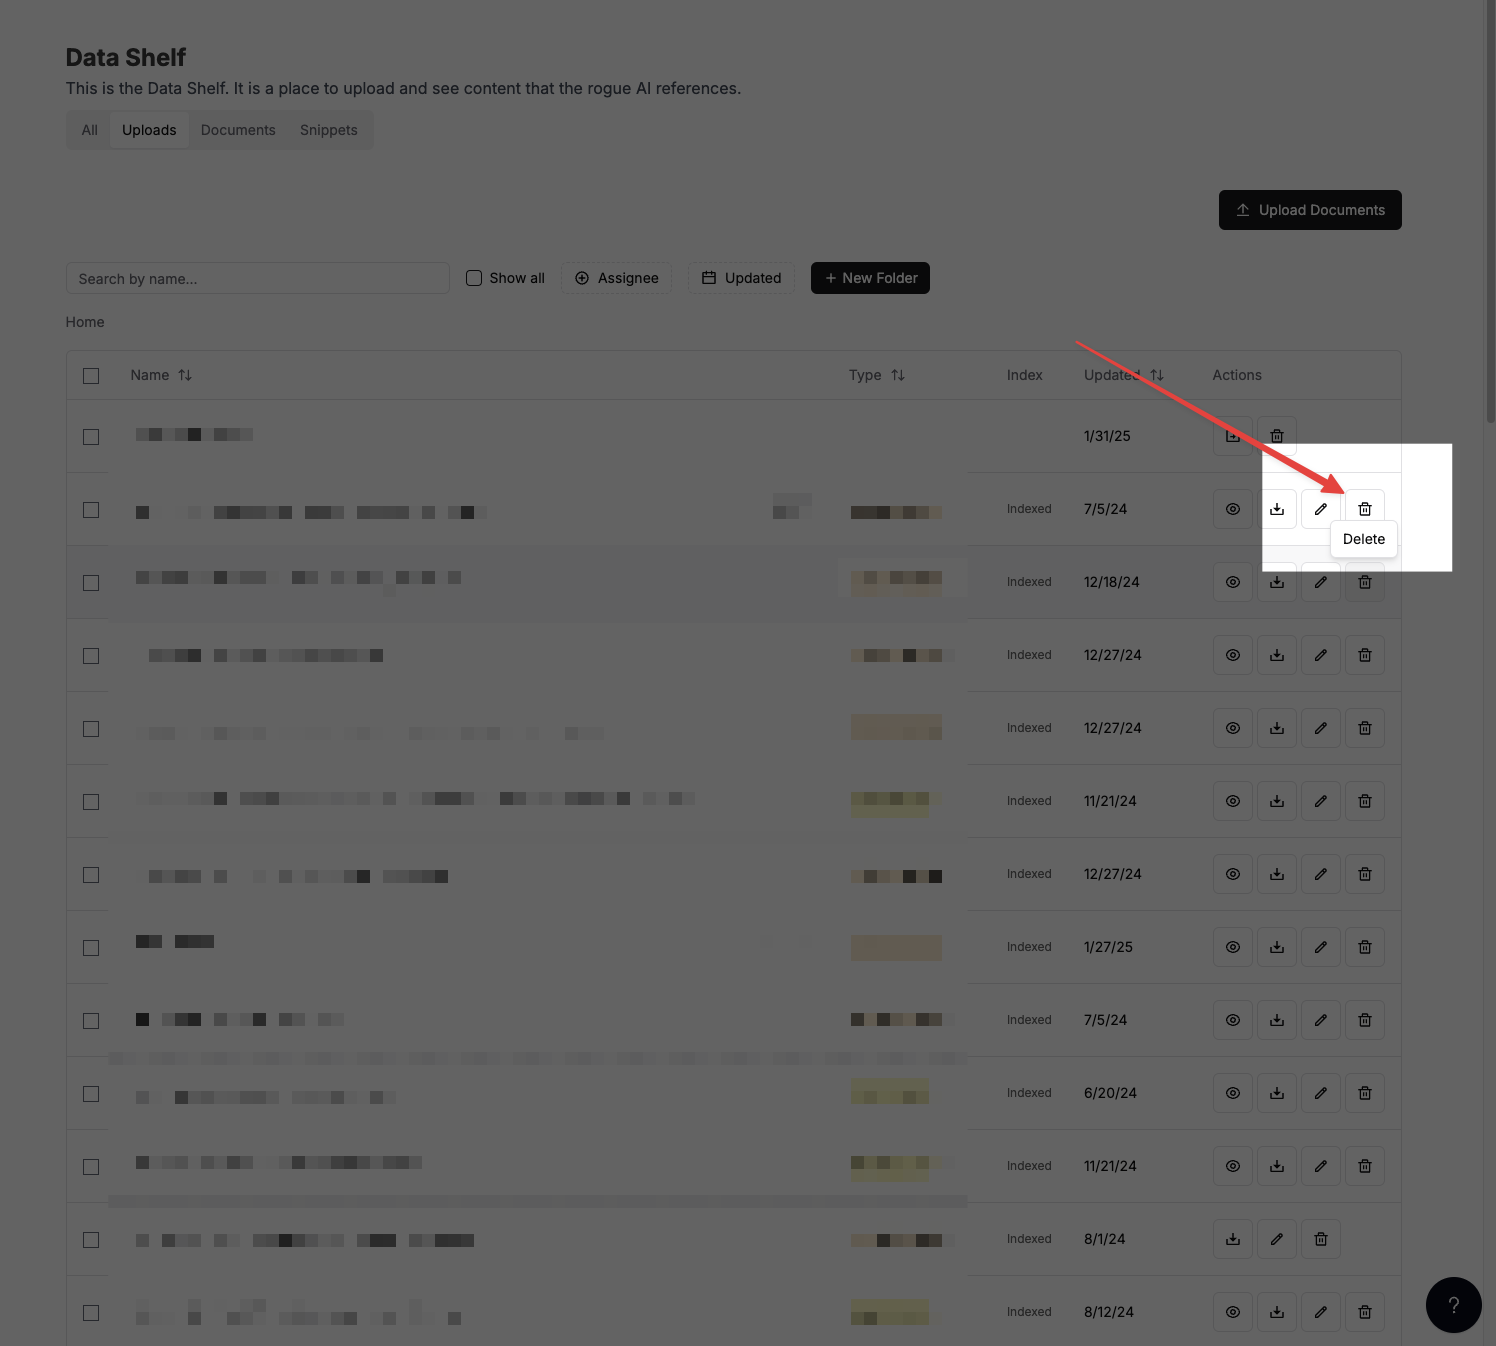
## Deleting Documents
To delete a document from your data shelf:
1. Go to the data shelf tab
2. Look on the far right of the screen under "actions"
3. Click delete
> Note, you can elect to include or exclude documents from indexing by selecting the check box. Indexing means that the AI will search through that document and potentially reuse it's contents in generating new content.
## Deleting Documents
To delete a document from your data shelf:
1. Go to the data shelf tab
2. Look on the far right of the screen under "actions"
3. Click delete