> ## Documentation Index
> Fetch the complete documentation index at: https://docs.userogue.com/llms.txt
> Use this file to discover all available pages before exploring further.
# Using the Writing Interface
> Guide to using the writing interface
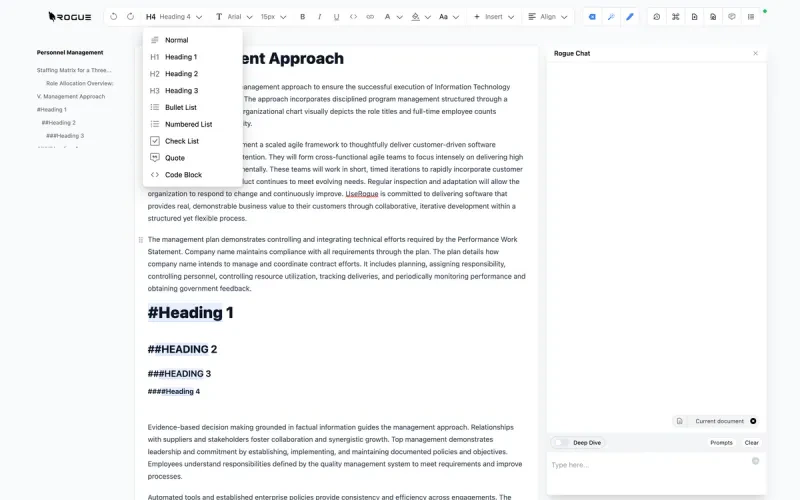
The UseRogue writing interface is a full-featured word processor with all of the formatting options you expect. Note that UseRogue uses open markdown format, so copying and pasting between UseRogue and any other word processor is seamless.
UseRogue features multi-user capability, any members of an organizaiton can
edit any document in that organizaiton simultaneously. Passing drafts around
by email or shared drive is a thing of the past.{" "}
{" "}
 ## In-Line Writing Tools
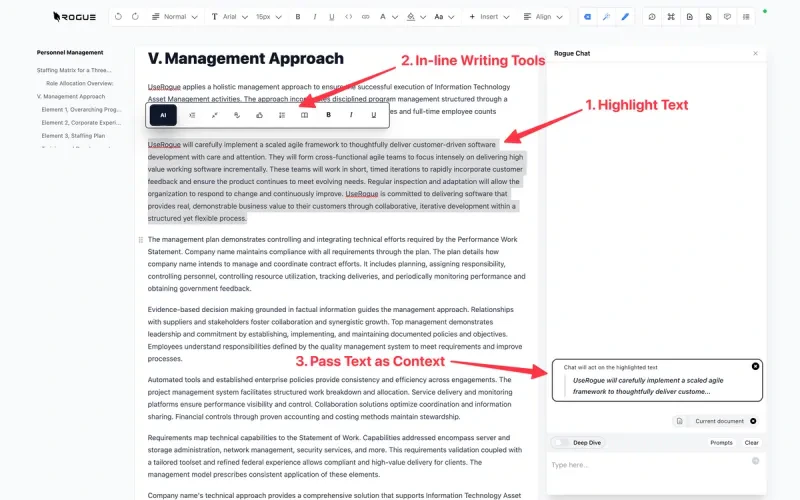
The in-line writing tools enable you to write 10x faster, and it all starts when you highlight a piece of text.
When you highlight text you will notice that the writing tool bar pops up, that same text is also passed as context to the Rogue chat bar to the right.
{" "}
## In-Line Writing Tools
The in-line writing tools enable you to write 10x faster, and it all starts when you highlight a piece of text.
When you highlight text you will notice that the writing tool bar pops up, that same text is also passed as context to the Rogue chat bar to the right.
{" "}
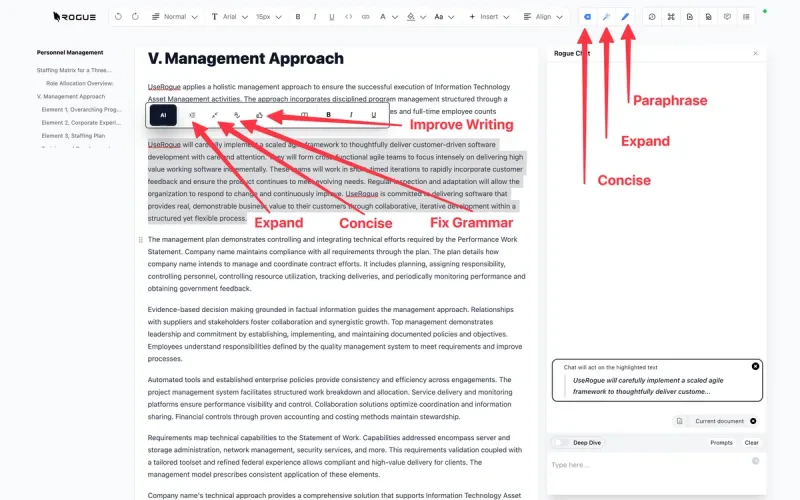
 The in-line writing tool bar has a number of power writing tools, including:
1. Expand - turn a sentence into a paragraph or a paragraph into a page, great for turning bullet points from your technical folks into fully formed proposal content.
2. Concise - cut all of the extraneous language out of a piece of writing, great for getting under page count.
3. Fix Grammar - let the AI do your copy editing
4. Improve Writing - turn jargon-laden or complex writing that maybe does not match your one voice into a consistent and readable section.
The in-line writing tool bar has a number of power writing tools, including:
1. Expand - turn a sentence into a paragraph or a paragraph into a page, great for turning bullet points from your technical folks into fully formed proposal content.
2. Concise - cut all of the extraneous language out of a piece of writing, great for getting under page count.
3. Fix Grammar - let the AI do your copy editing
4. Improve Writing - turn jargon-laden or complex writing that maybe does not match your one voice into a consistent and readable section.
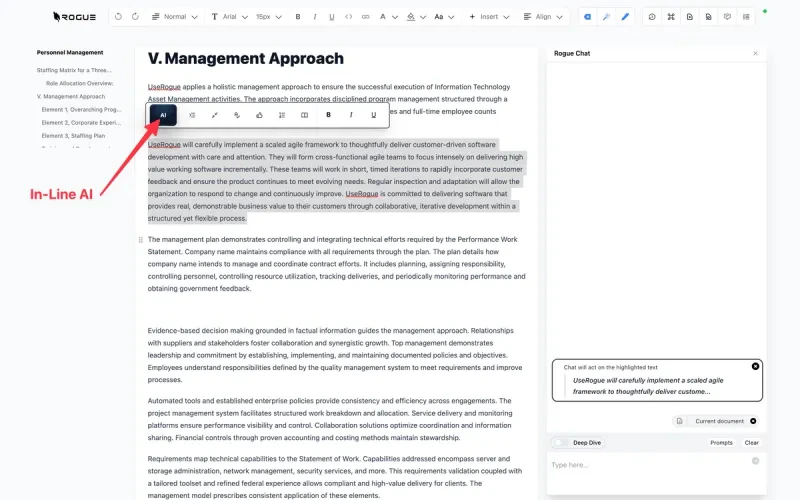
 You can use the same highlight function to invoke the in-line AI tool, simply highlight a piece of content and select the AI button.
{" "}
You can use the same highlight function to invoke the in-line AI tool, simply highlight a piece of content and select the AI button.
{" "}
 Prompt engineering is not necessary with UseRogue, just give the chat plain language instructions.
{" "}
Prompt engineering is not necessary with UseRogue, just give the chat plain language instructions.
{" "}
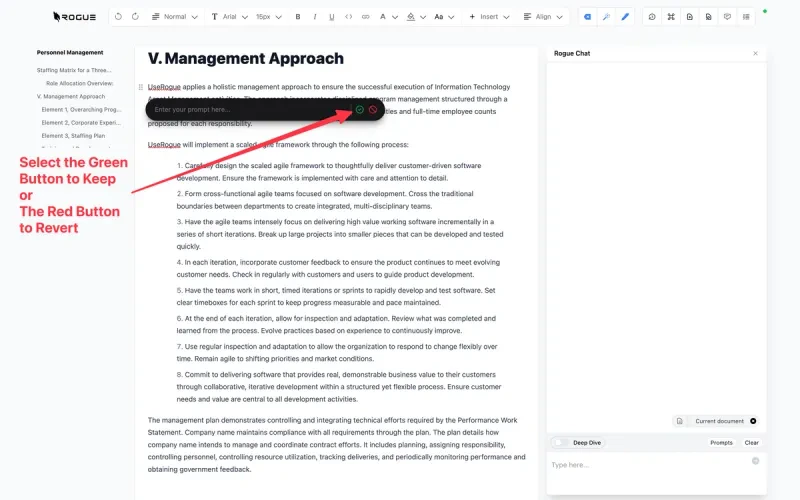
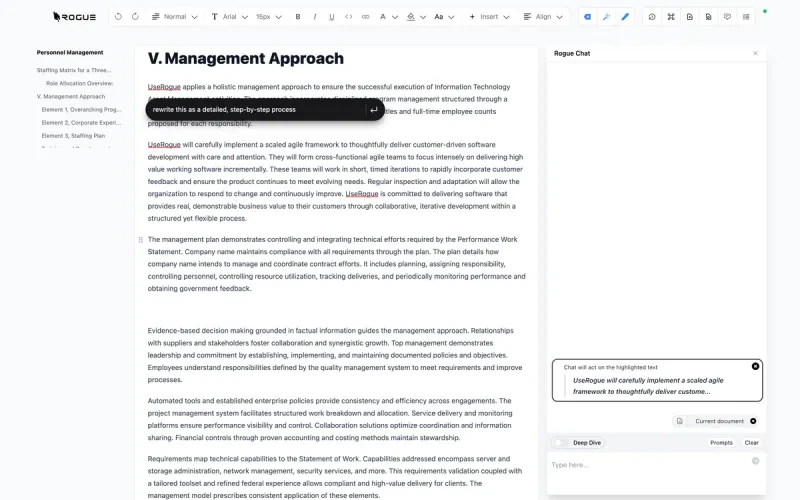 The in-line AI tool will automatically generate content and drop it directly where you are writing.
If you like what it generated select the green check mark, or reject it with the red x.
{" "}
The in-line AI tool will automatically generate content and drop it directly where you are writing.
If you like what it generated select the green check mark, or reject it with the red x.
{" "}
 ## RogueChat
Chat is not a product, it's a feature, and if it requires prompt engineering then it's a poor feature.
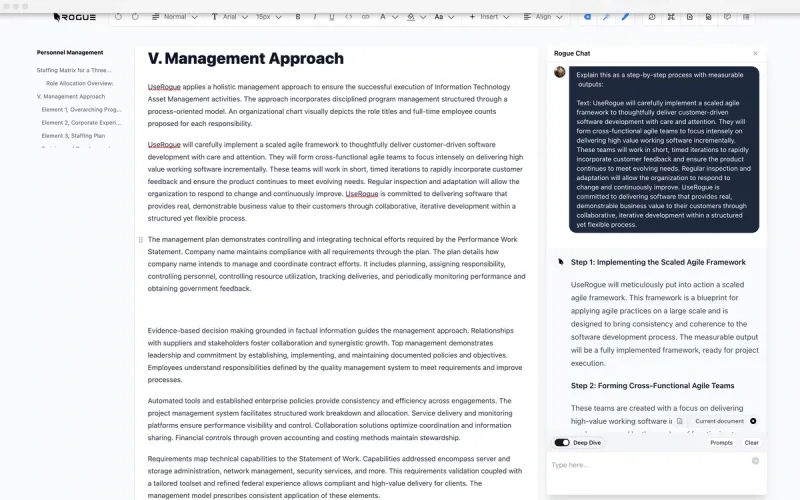
With RogueChat you can simply select a piece of content and make plain language instructions to the chat, just like the in-line tool, but for much longer, larger, and more complex content.
{" "}
## RogueChat
Chat is not a product, it's a feature, and if it requires prompt engineering then it's a poor feature.
With RogueChat you can simply select a piece of content and make plain language instructions to the chat, just like the in-line tool, but for much longer, larger, and more complex content.
{" "}
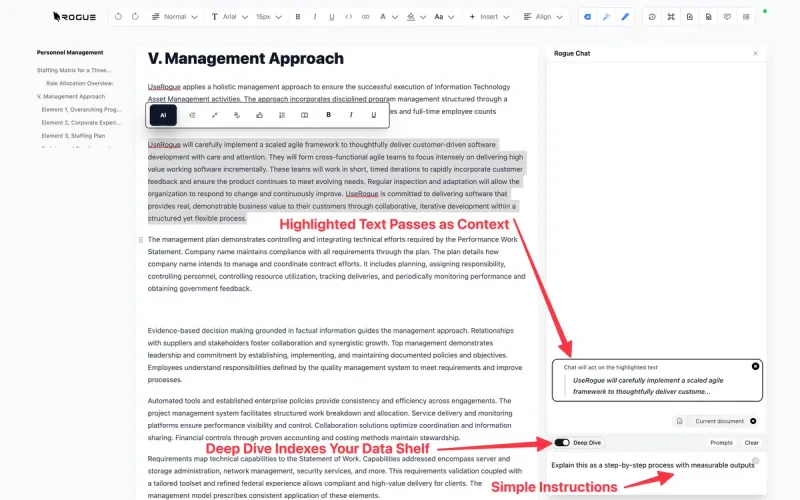 Selecting Deep Drive enables the chat to index your data shelf, by doing so the chat will semantically search for content in your data shelf that matches the content you selected and use that content as feedstock for it's generation. This enables the AI to speak about your company, goods, services, approaches, etc not just as you would, but as you have in past proposals. Now, the AI is not simply going to regurgitate your old content, because it also uses the current document as context, so it will meld the two, as a human would when reusing content.
{" "}
Selecting Deep Drive enables the chat to index your data shelf, by doing so the chat will semantically search for content in your data shelf that matches the content you selected and use that content as feedstock for it's generation. This enables the AI to speak about your company, goods, services, approaches, etc not just as you would, but as you have in past proposals. Now, the AI is not simply going to regurgitate your old content, because it also uses the current document as context, so it will meld the two, as a human would when reusing content.
{" "}
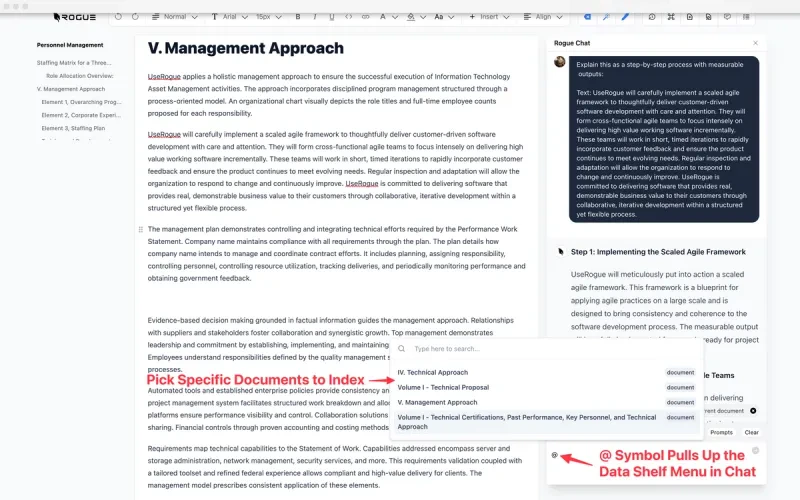
 To add another degree of control, if you know of a document on your shelf that you want the AI to index specifically, you can type the @ symbol and pick documents from your shelf and pass them to the AI specifically.
{" "}
To add another degree of control, if you know of a document on your shelf that you want the AI to index specifically, you can type the @ symbol and pick documents from your shelf and pass them to the AI specifically.
{" "}
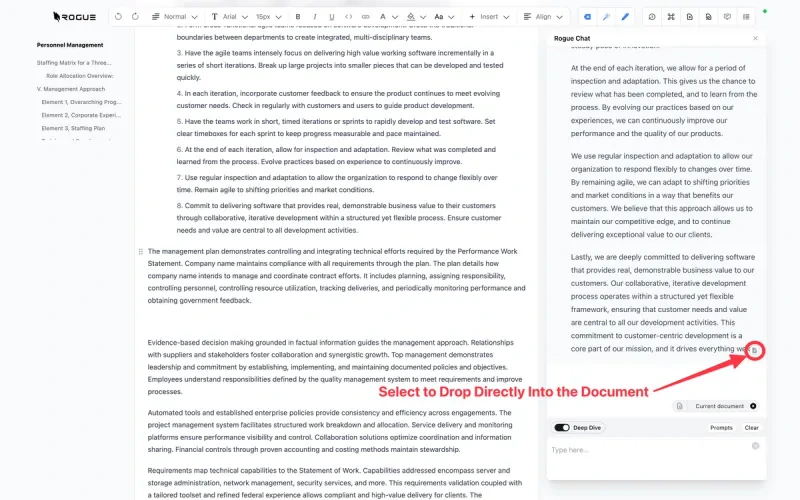
 Whenever you use RogueChat you can drop the generated content directly into the writing interface by selecting the small document icon at the bottom of the generaiton. The content will drop in wherever you left your cursor.
{" "}
Whenever you use RogueChat you can drop the generated content directly into the writing interface by selecting the small document icon at the bottom of the generaiton. The content will drop in wherever you left your cursor.
{" "}
 ## Compliance Matrix
The Compliance Matrix tool suite is designed to help you get to a compliant proposal as fast as possible so you can focus on proposal quality.
{" "}
## Compliance Matrix
The Compliance Matrix tool suite is designed to help you get to a compliant proposal as fast as possible so you can focus on proposal quality.
{" "}
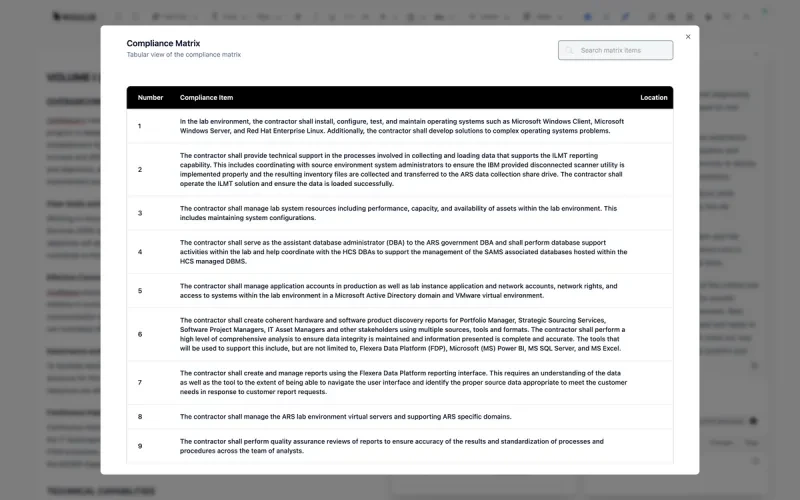
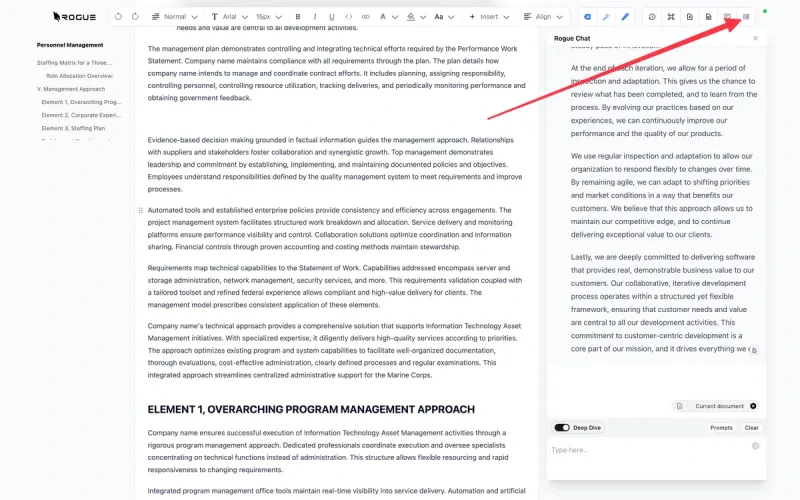 All of your compliance items are listed in one place with a search bar to help you find compliance requirements.
Note: the compliance matrix is federated across all documents in a war room,
so you can keep track of compliance requirements regardless of which volume
you may be working in.
In the compliance matrix menu you have a number of options:
1. Toggle through items to see which have been completed and which are still outstanding
2. Selecting "Generate Draft Content" will create semantically relevant content, and doing so with Deep Drive toggled will generate relevant content with your data shelf as feedstock
3. Check compliance for a given item throughout the document
{" "}
All of your compliance items are listed in one place with a search bar to help you find compliance requirements.
Note: the compliance matrix is federated across all documents in a war room,
so you can keep track of compliance requirements regardless of which volume
you may be working in.
In the compliance matrix menu you have a number of options:
1. Toggle through items to see which have been completed and which are still outstanding
2. Selecting "Generate Draft Content" will create semantically relevant content, and doing so with Deep Drive toggled will generate relevant content with your data shelf as feedstock
3. Check compliance for a given item throughout the document
{" "}
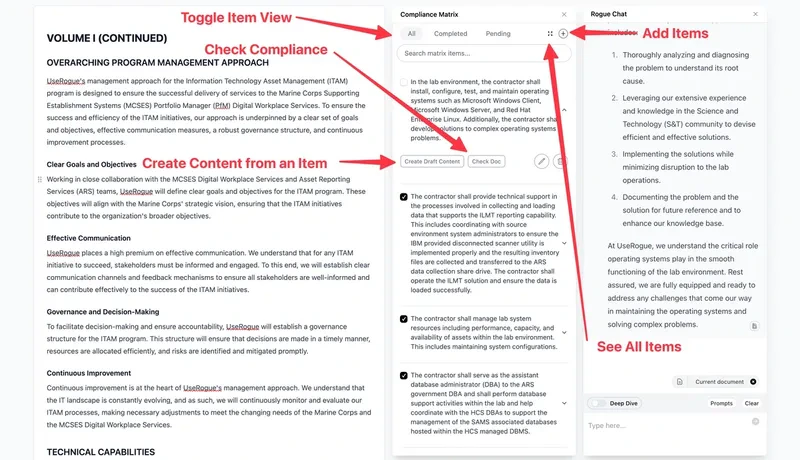 4. View all items
{" "}
4. View all items
{" "}
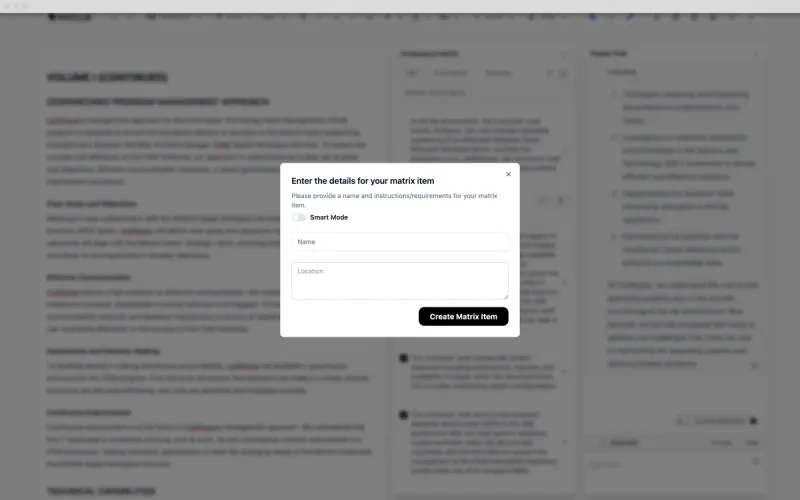
 5. Add compliance items, which can be done individually by hand
{" "}
5. Add compliance items, which can be done individually by hand
{" "}
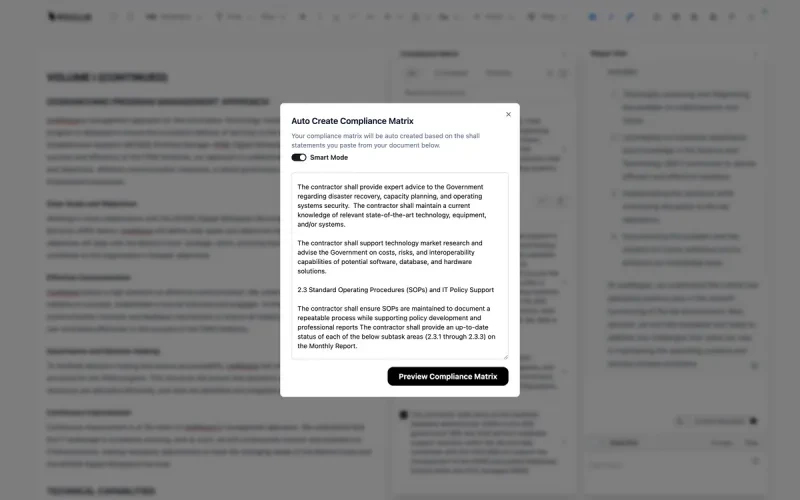
 Or, if you toggle "Smart Mode" you can simply paste a section of shall, will, may statements directly from the solicitaiton and the AI will parse the relevant statements.
{" "}
Or, if you toggle "Smart Mode" you can simply paste a section of shall, will, may statements directly from the solicitaiton and the AI will parse the relevant statements.
{" "}
 ## Snippets
The chat interface and the other AI-powered tools are very potent in generating high-quality organic content. However, in the cases where you want to incorporate your best-in-breed verbiage, company standard content, or other structured content, we have the snippets bar.
{" "}
## Snippets
The chat interface and the other AI-powered tools are very potent in generating high-quality organic content. However, in the cases where you want to incorporate your best-in-breed verbiage, company standard content, or other structured content, we have the snippets bar.
{" "}
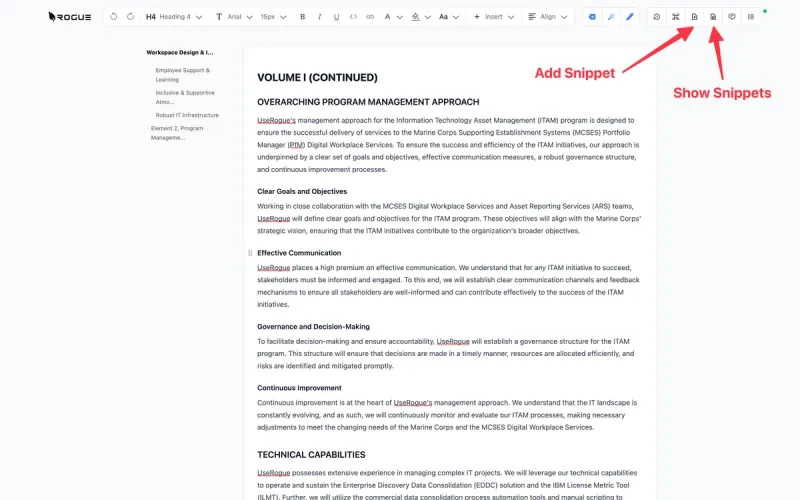 Think of the snippets bar as a curated document library in the writing work space. Selecting a snippet drops the content directly into the writing space where you left your cursor.
{" "}
Think of the snippets bar as a curated document library in the writing work space. Selecting a snippet drops the content directly into the writing space where you left your cursor.
{" "}
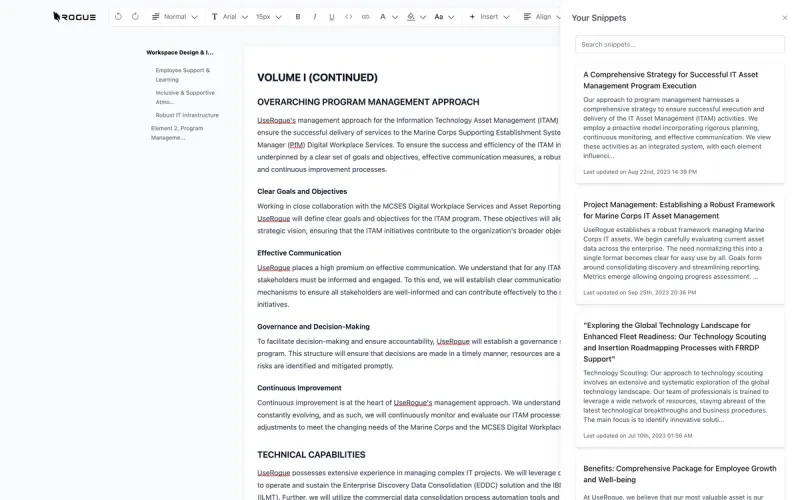 To add a snippet, simply paste the content into the "Add Snippet" screen and select "Add Snippet".
{" "}
To add a snippet, simply paste the content into the "Add Snippet" screen and select "Add Snippet".
{" "}
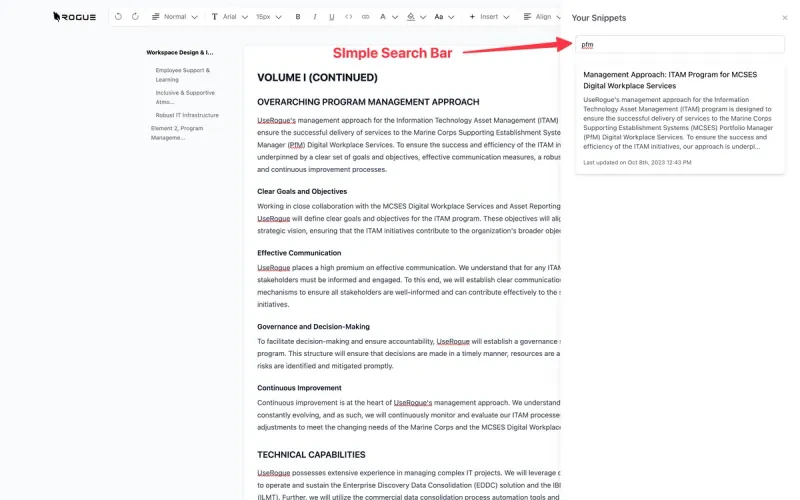
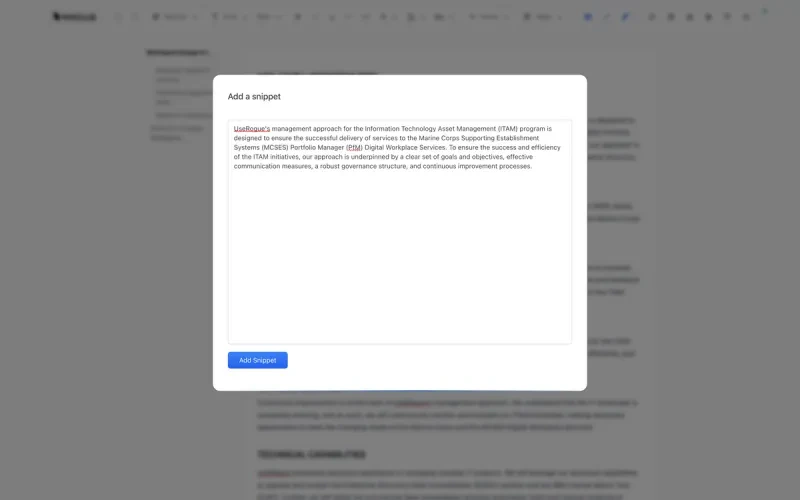 You can also use the search bar to find relevant content by key words or terms.
{" "}
You can also use the search bar to find relevant content by key words or terms.
{" "}
 ## Comments
The comments tool is designed to help with getting quickly through color team reviews and recovery.
## Comments
The comments tool is designed to help with getting quickly through color team reviews and recovery.
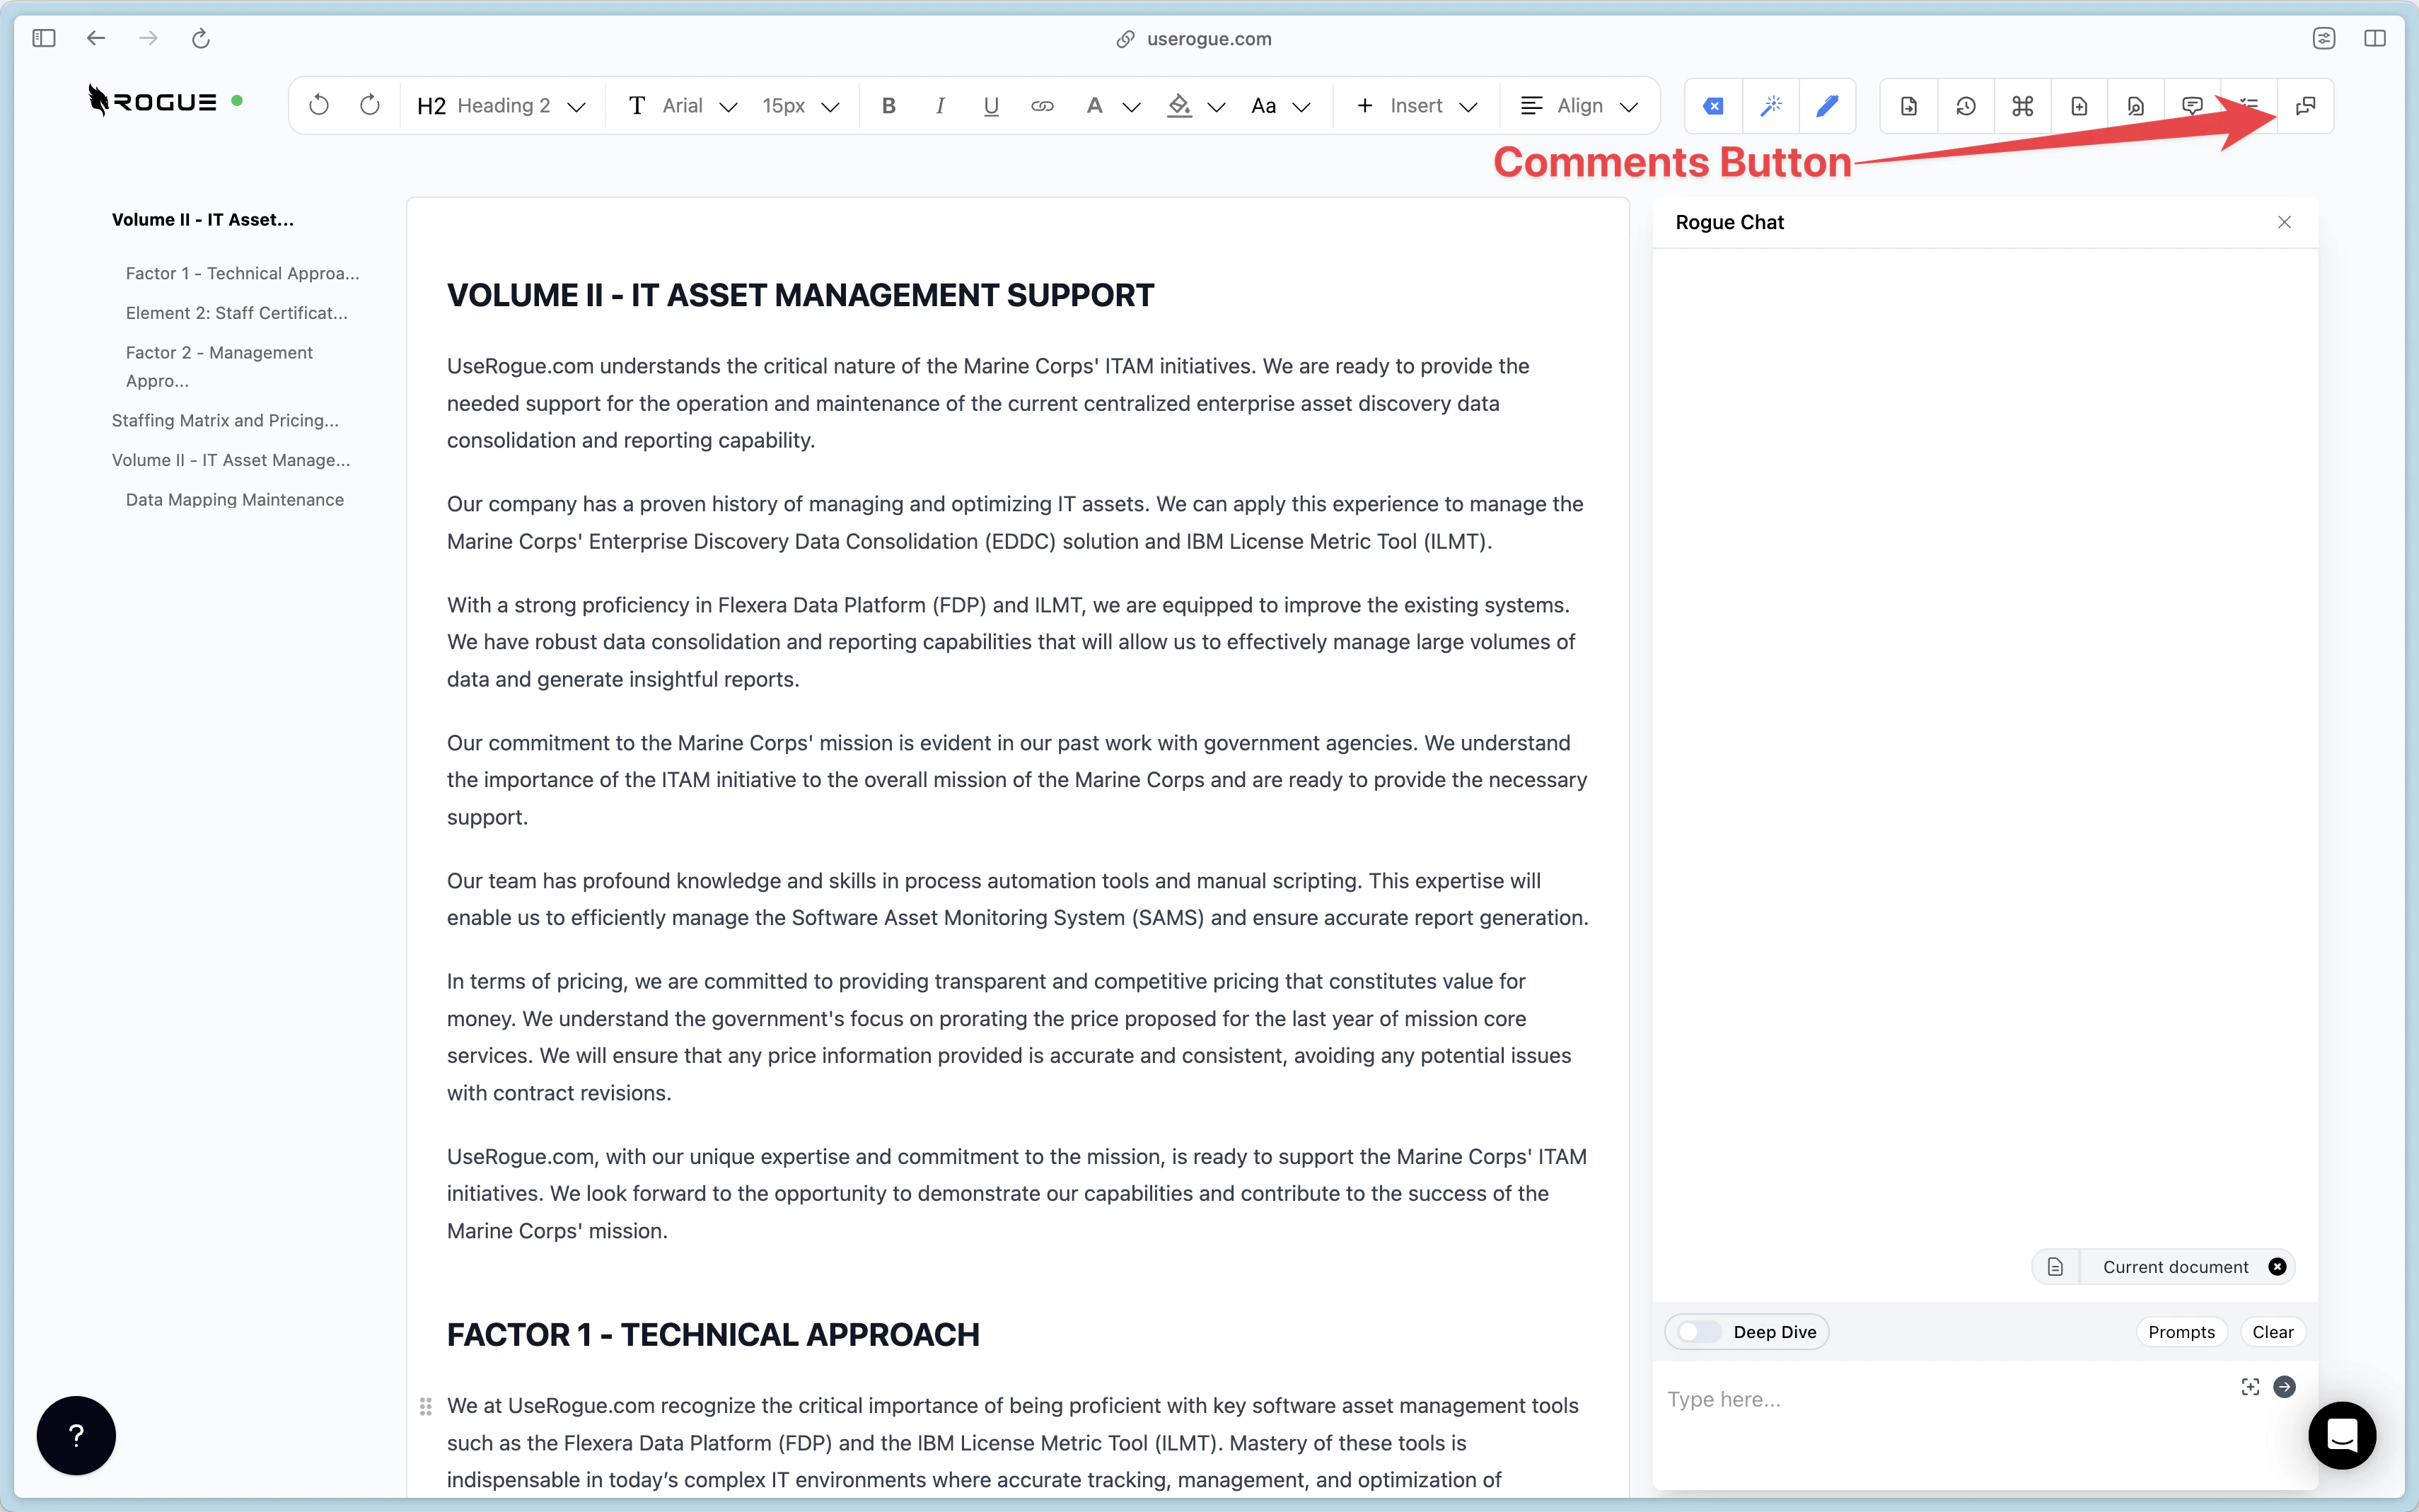 You can find the comments button on the top right tool bar.
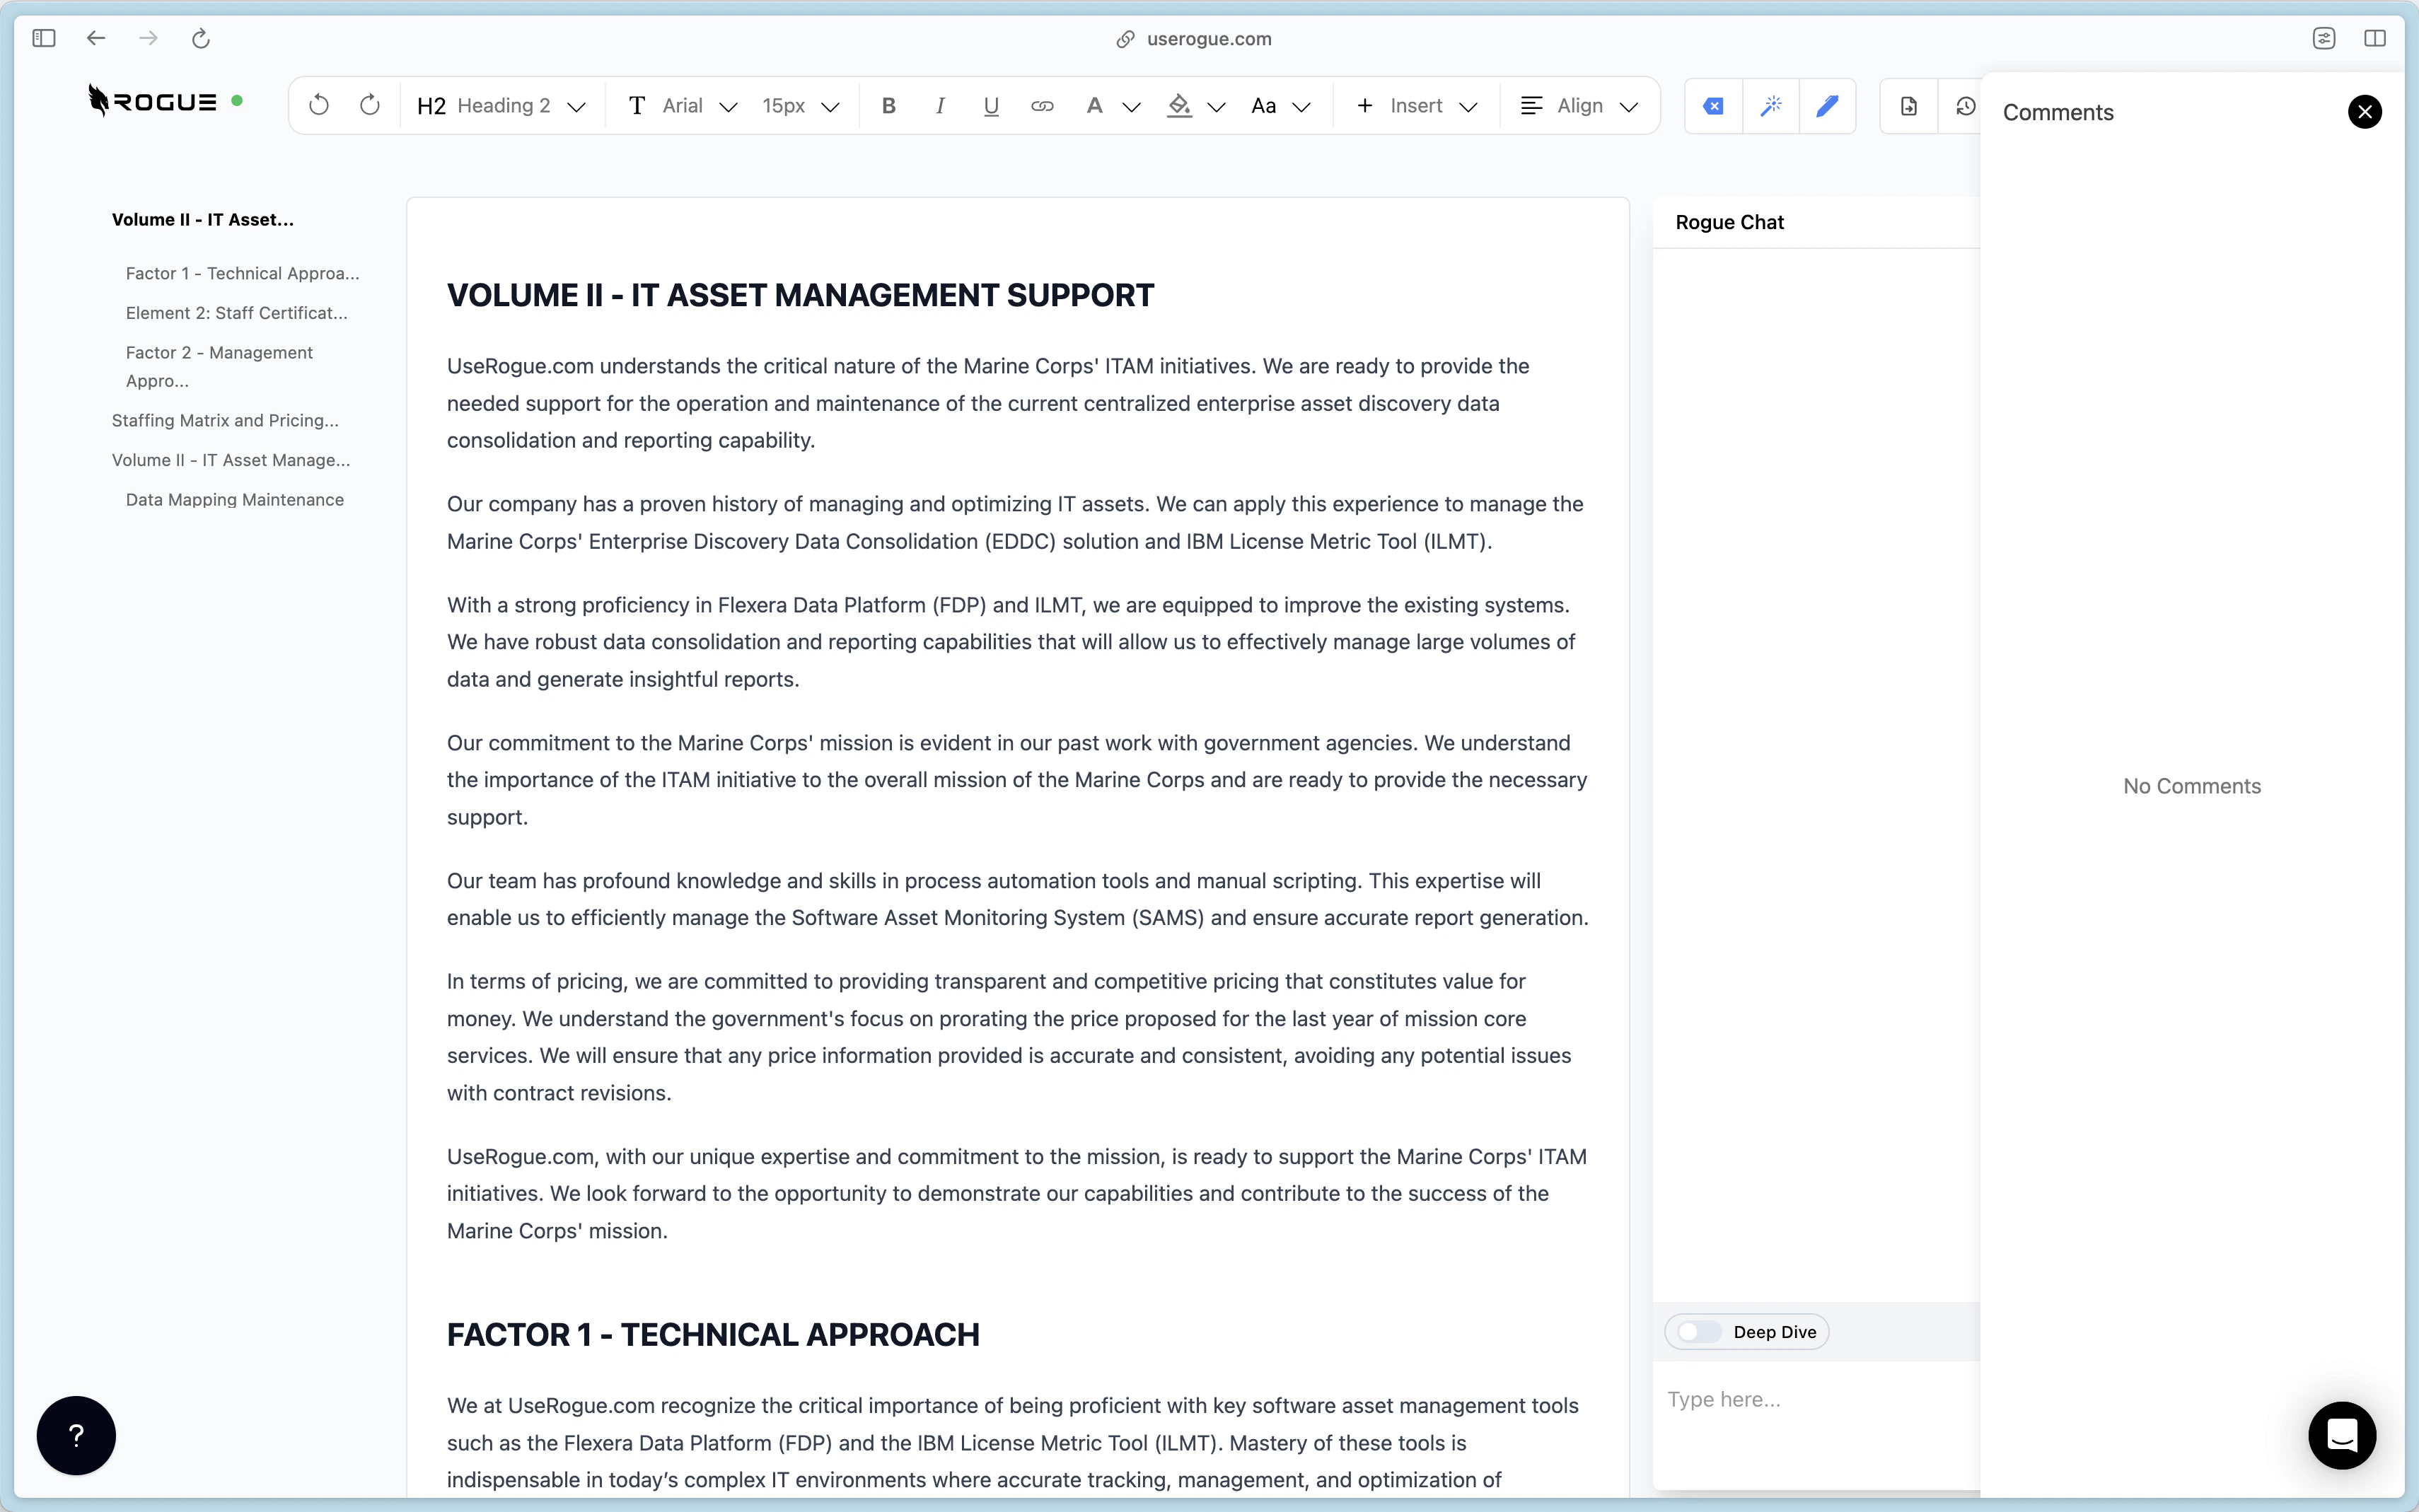 All of your comments are maintained in the comments bar on the right sidebar.
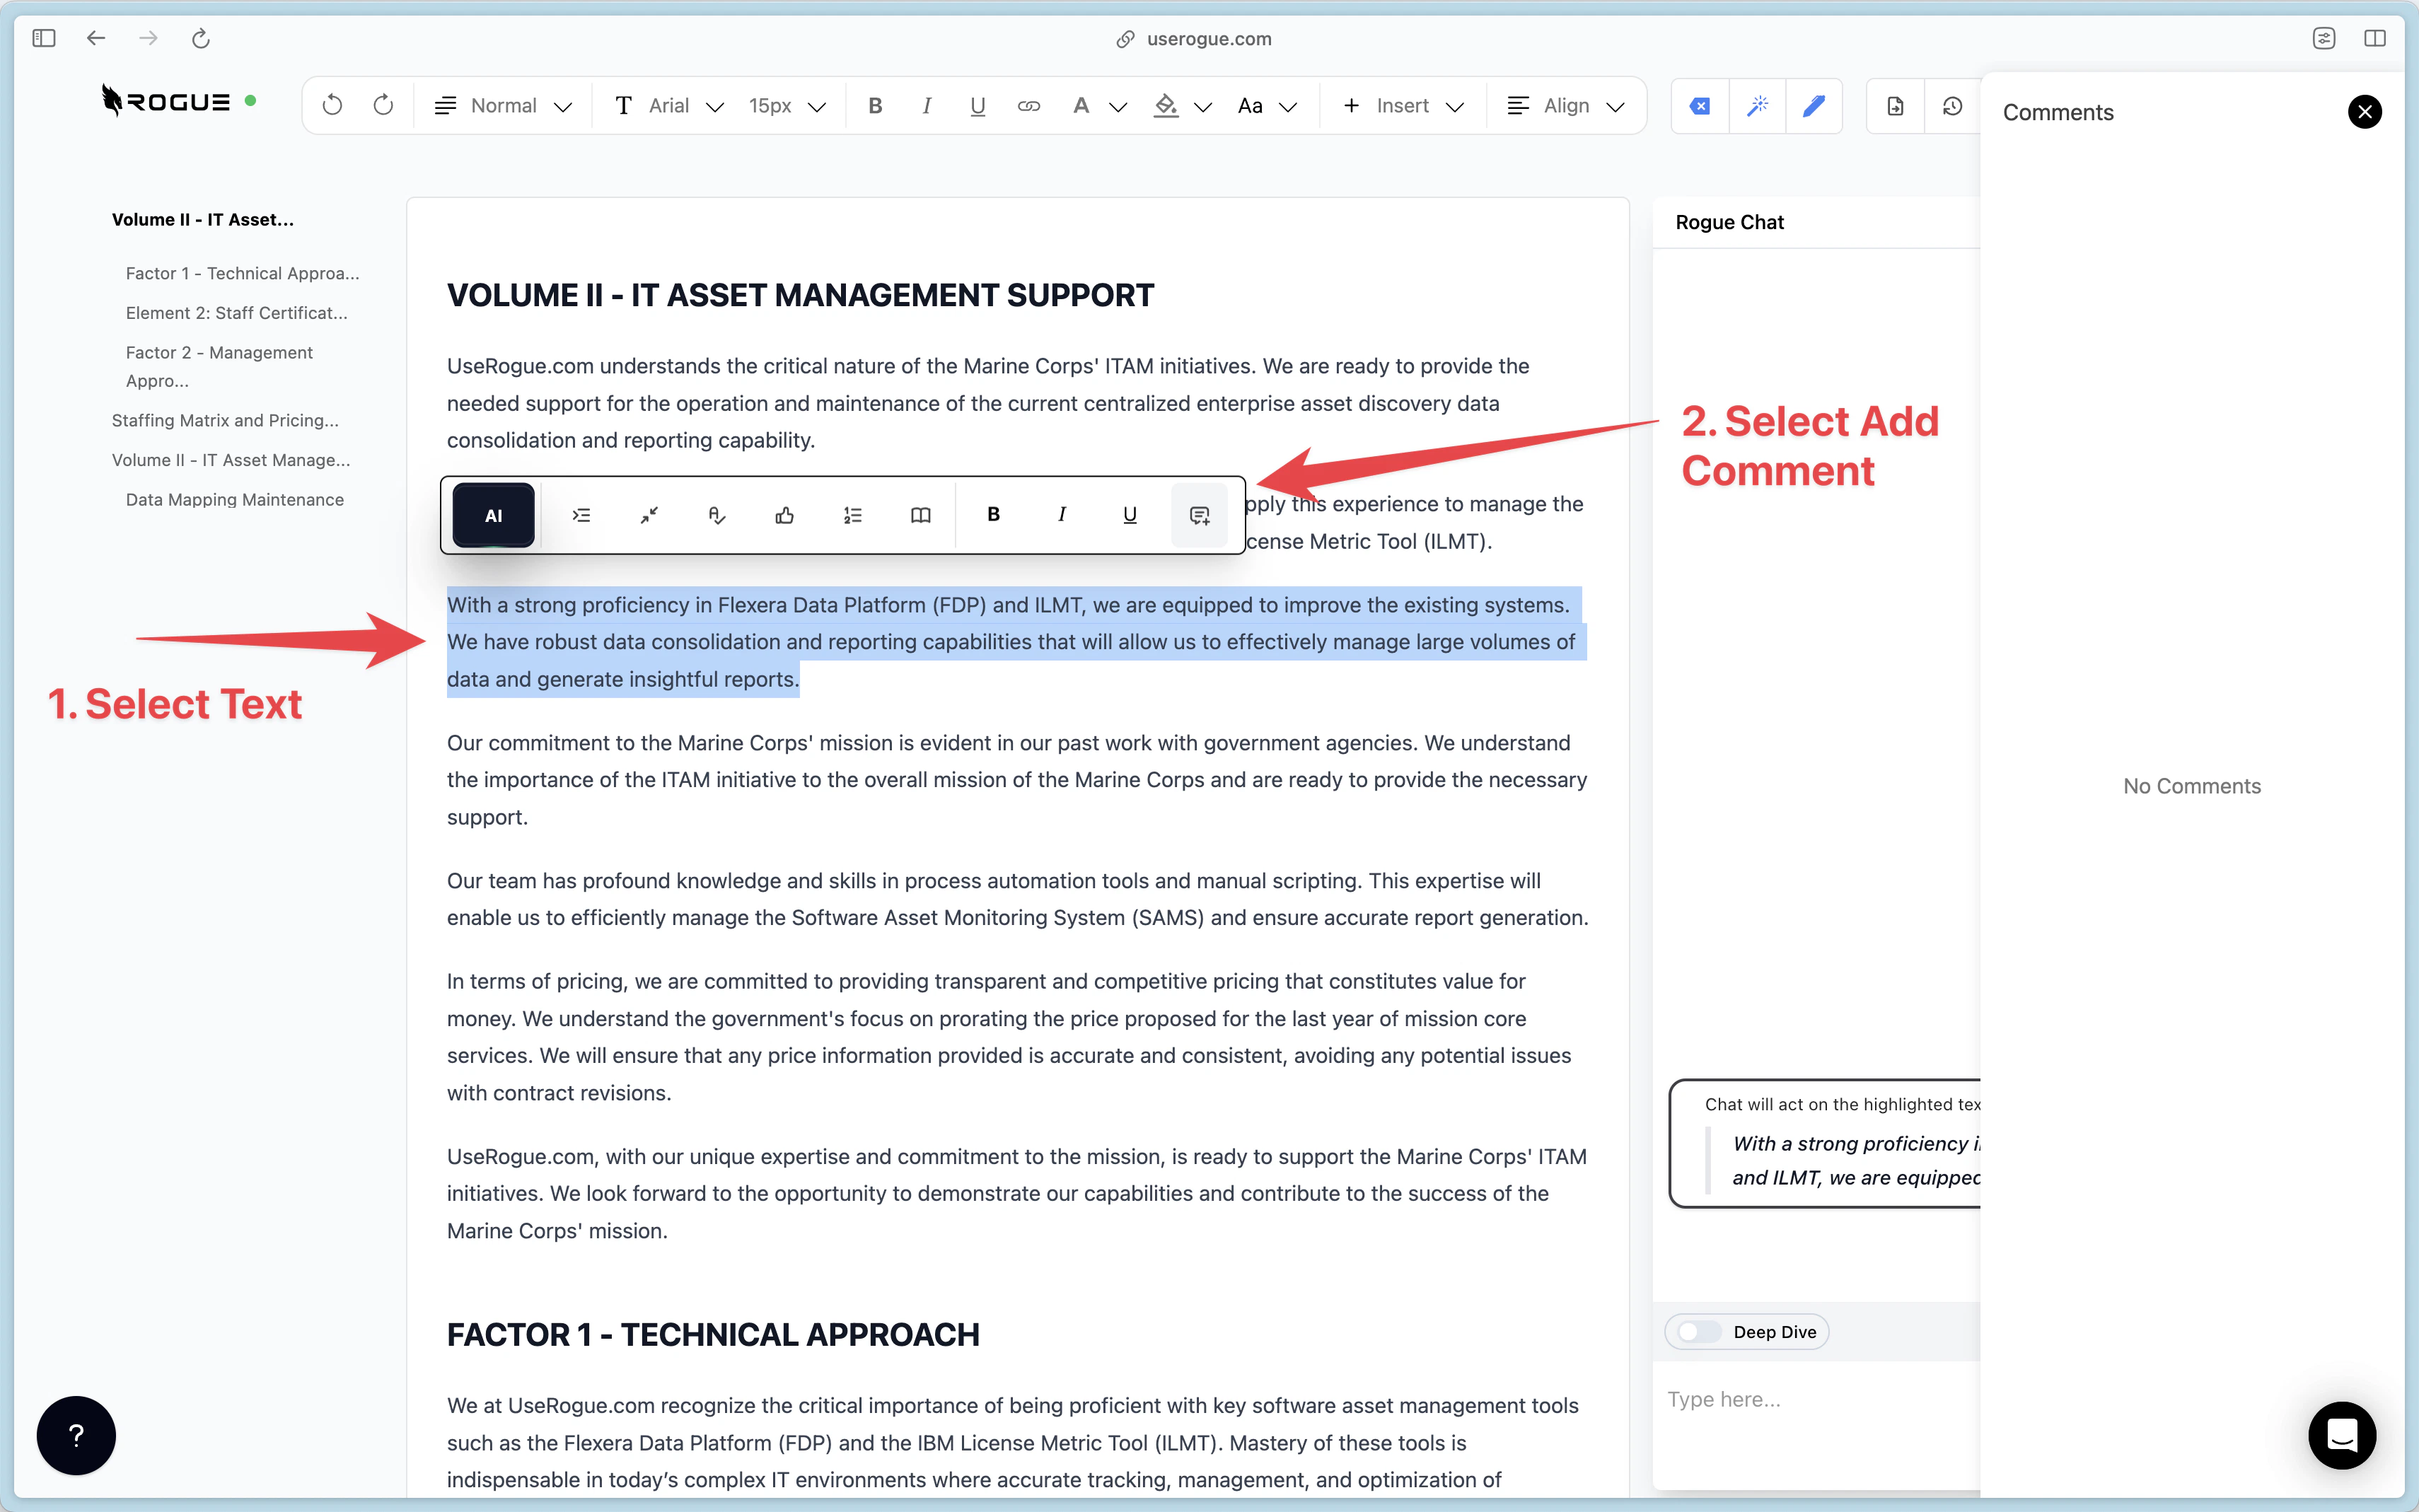 Adding a new comment is simple.
Just select the text to which you would like to add the comment, and select the comment button.
Adding a new comment is simple.
Just select the text to which you would like to add the comment, and select the comment button.
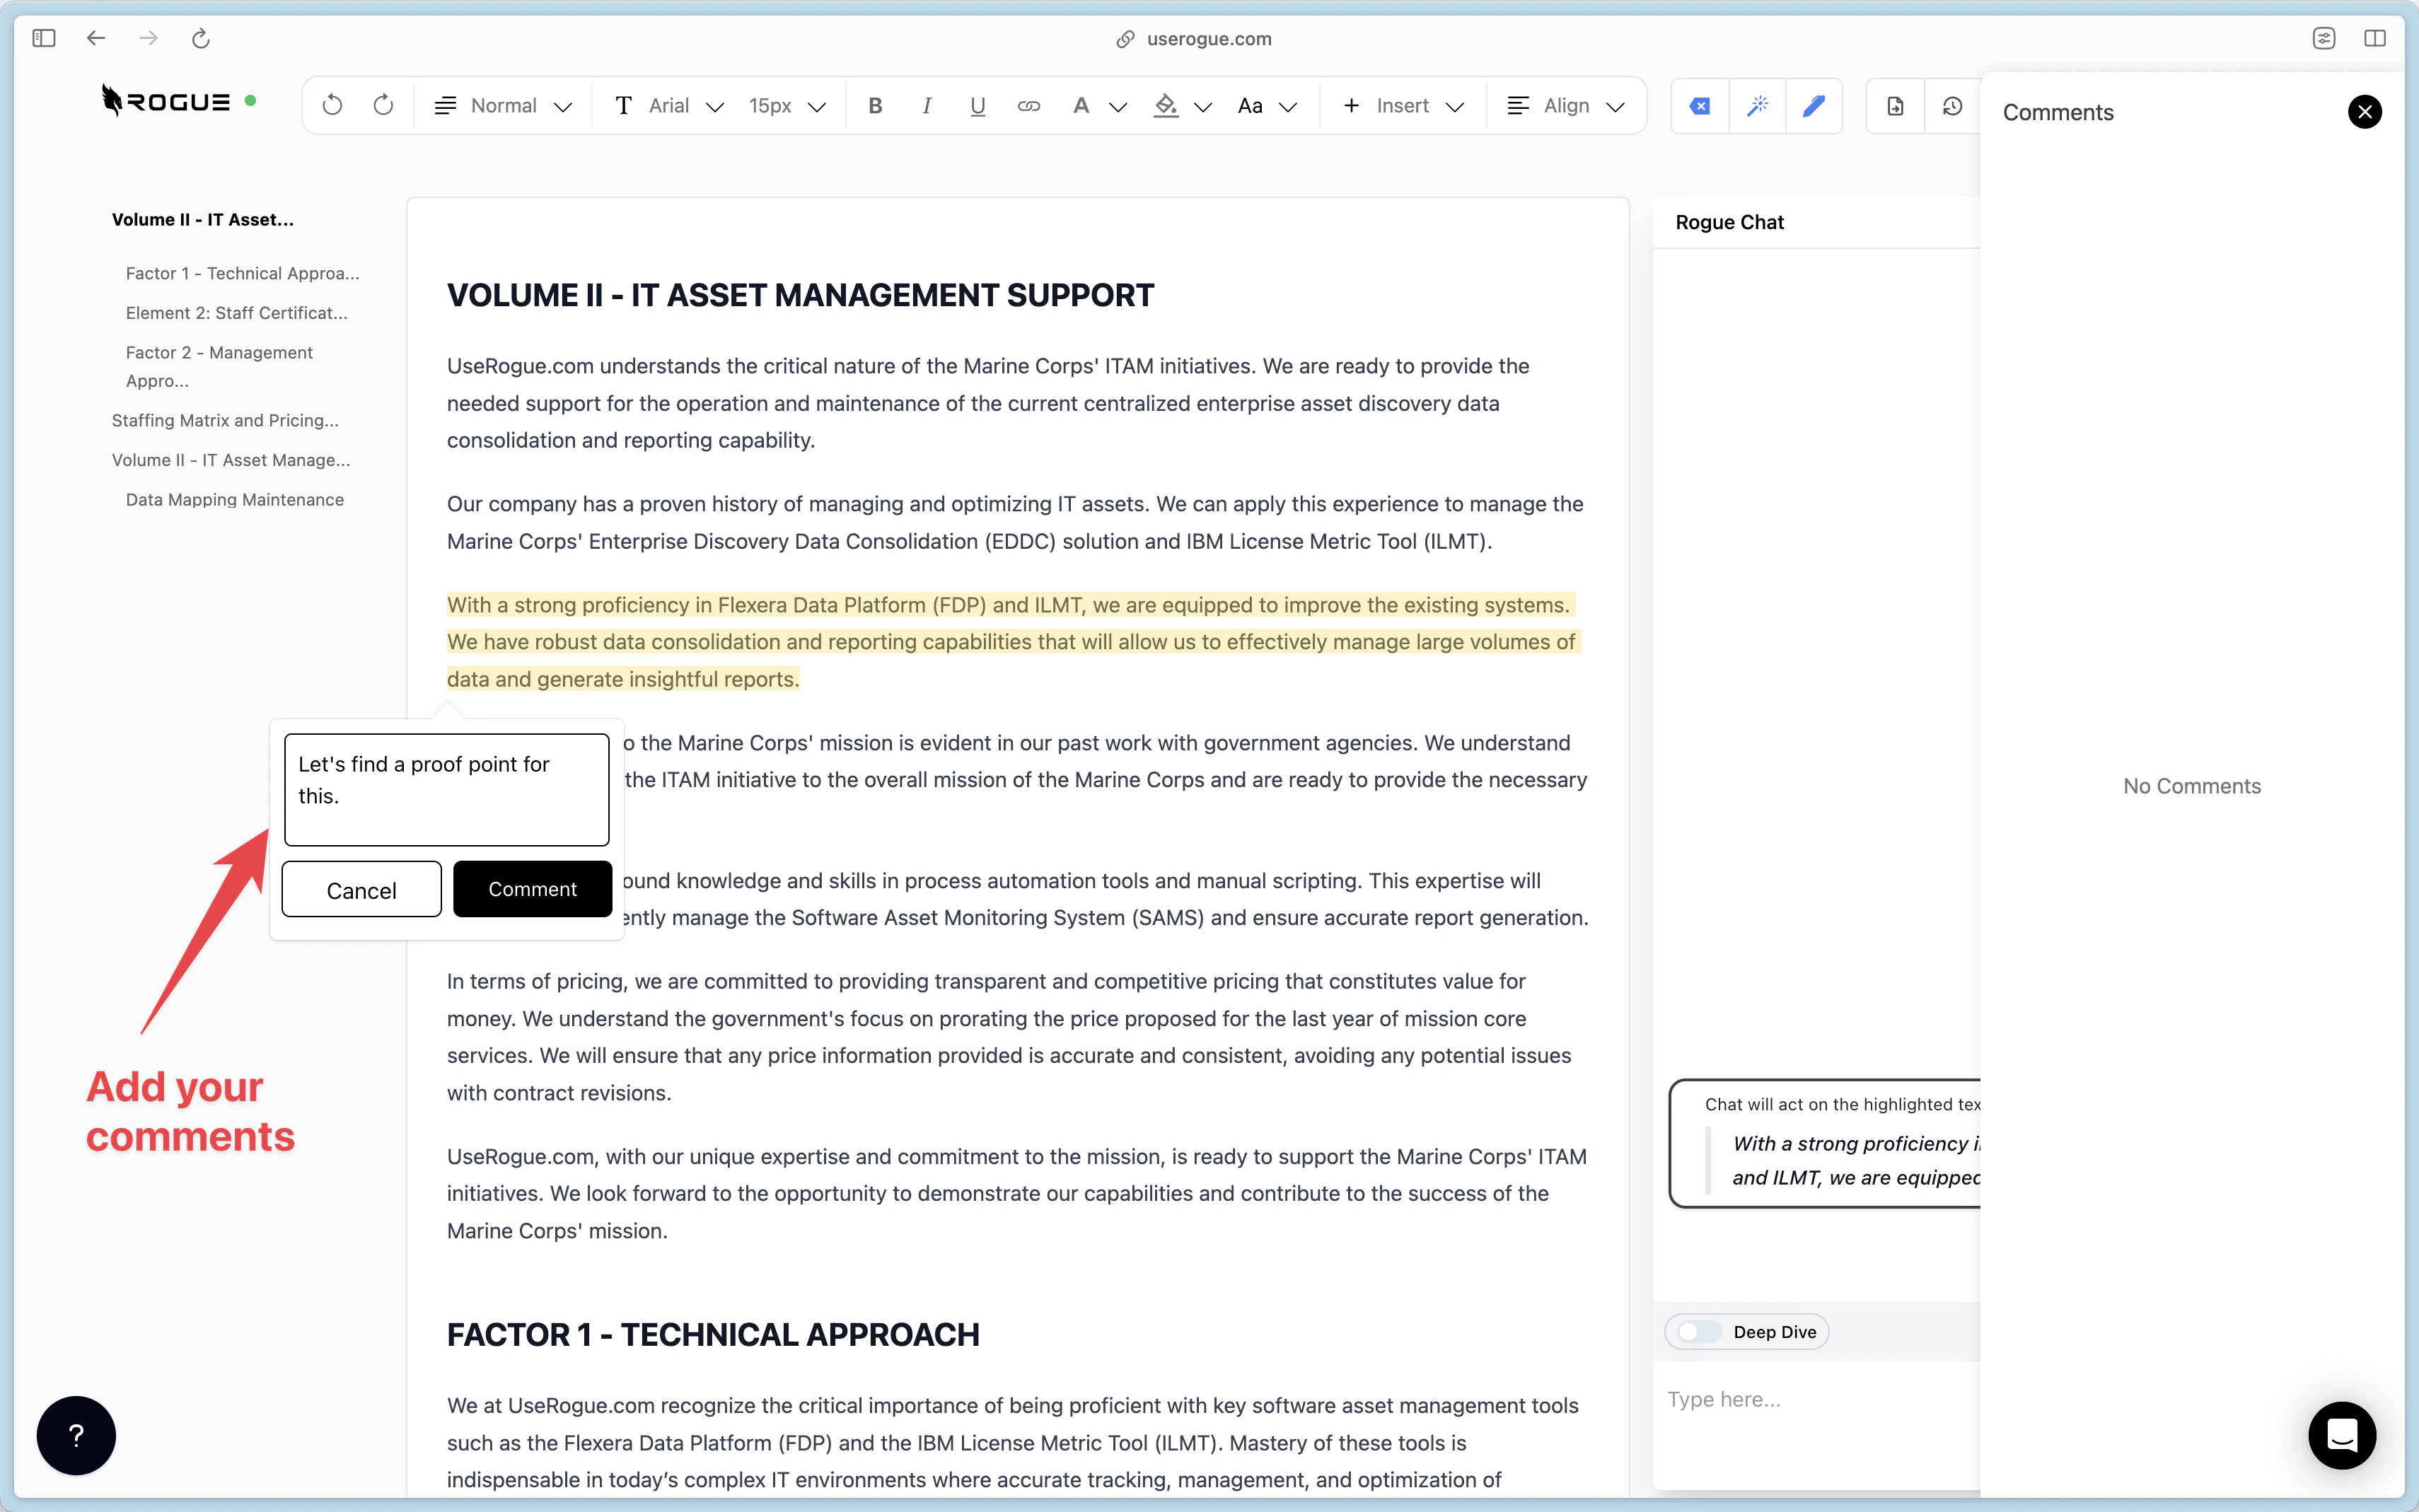 You can then add your comment and select "comment"
 Your comment will then show up on the right sidebar.
You can then add a response to the comment by selecting the comment.
## Document Export
You can export your document in Word format by selecting the export button on the top right tool bar.
Your comment will then show up on the right sidebar.
You can then add a response to the comment by selecting the comment.
## Document Export
You can export your document in Word format by selecting the export button on the top right tool bar.
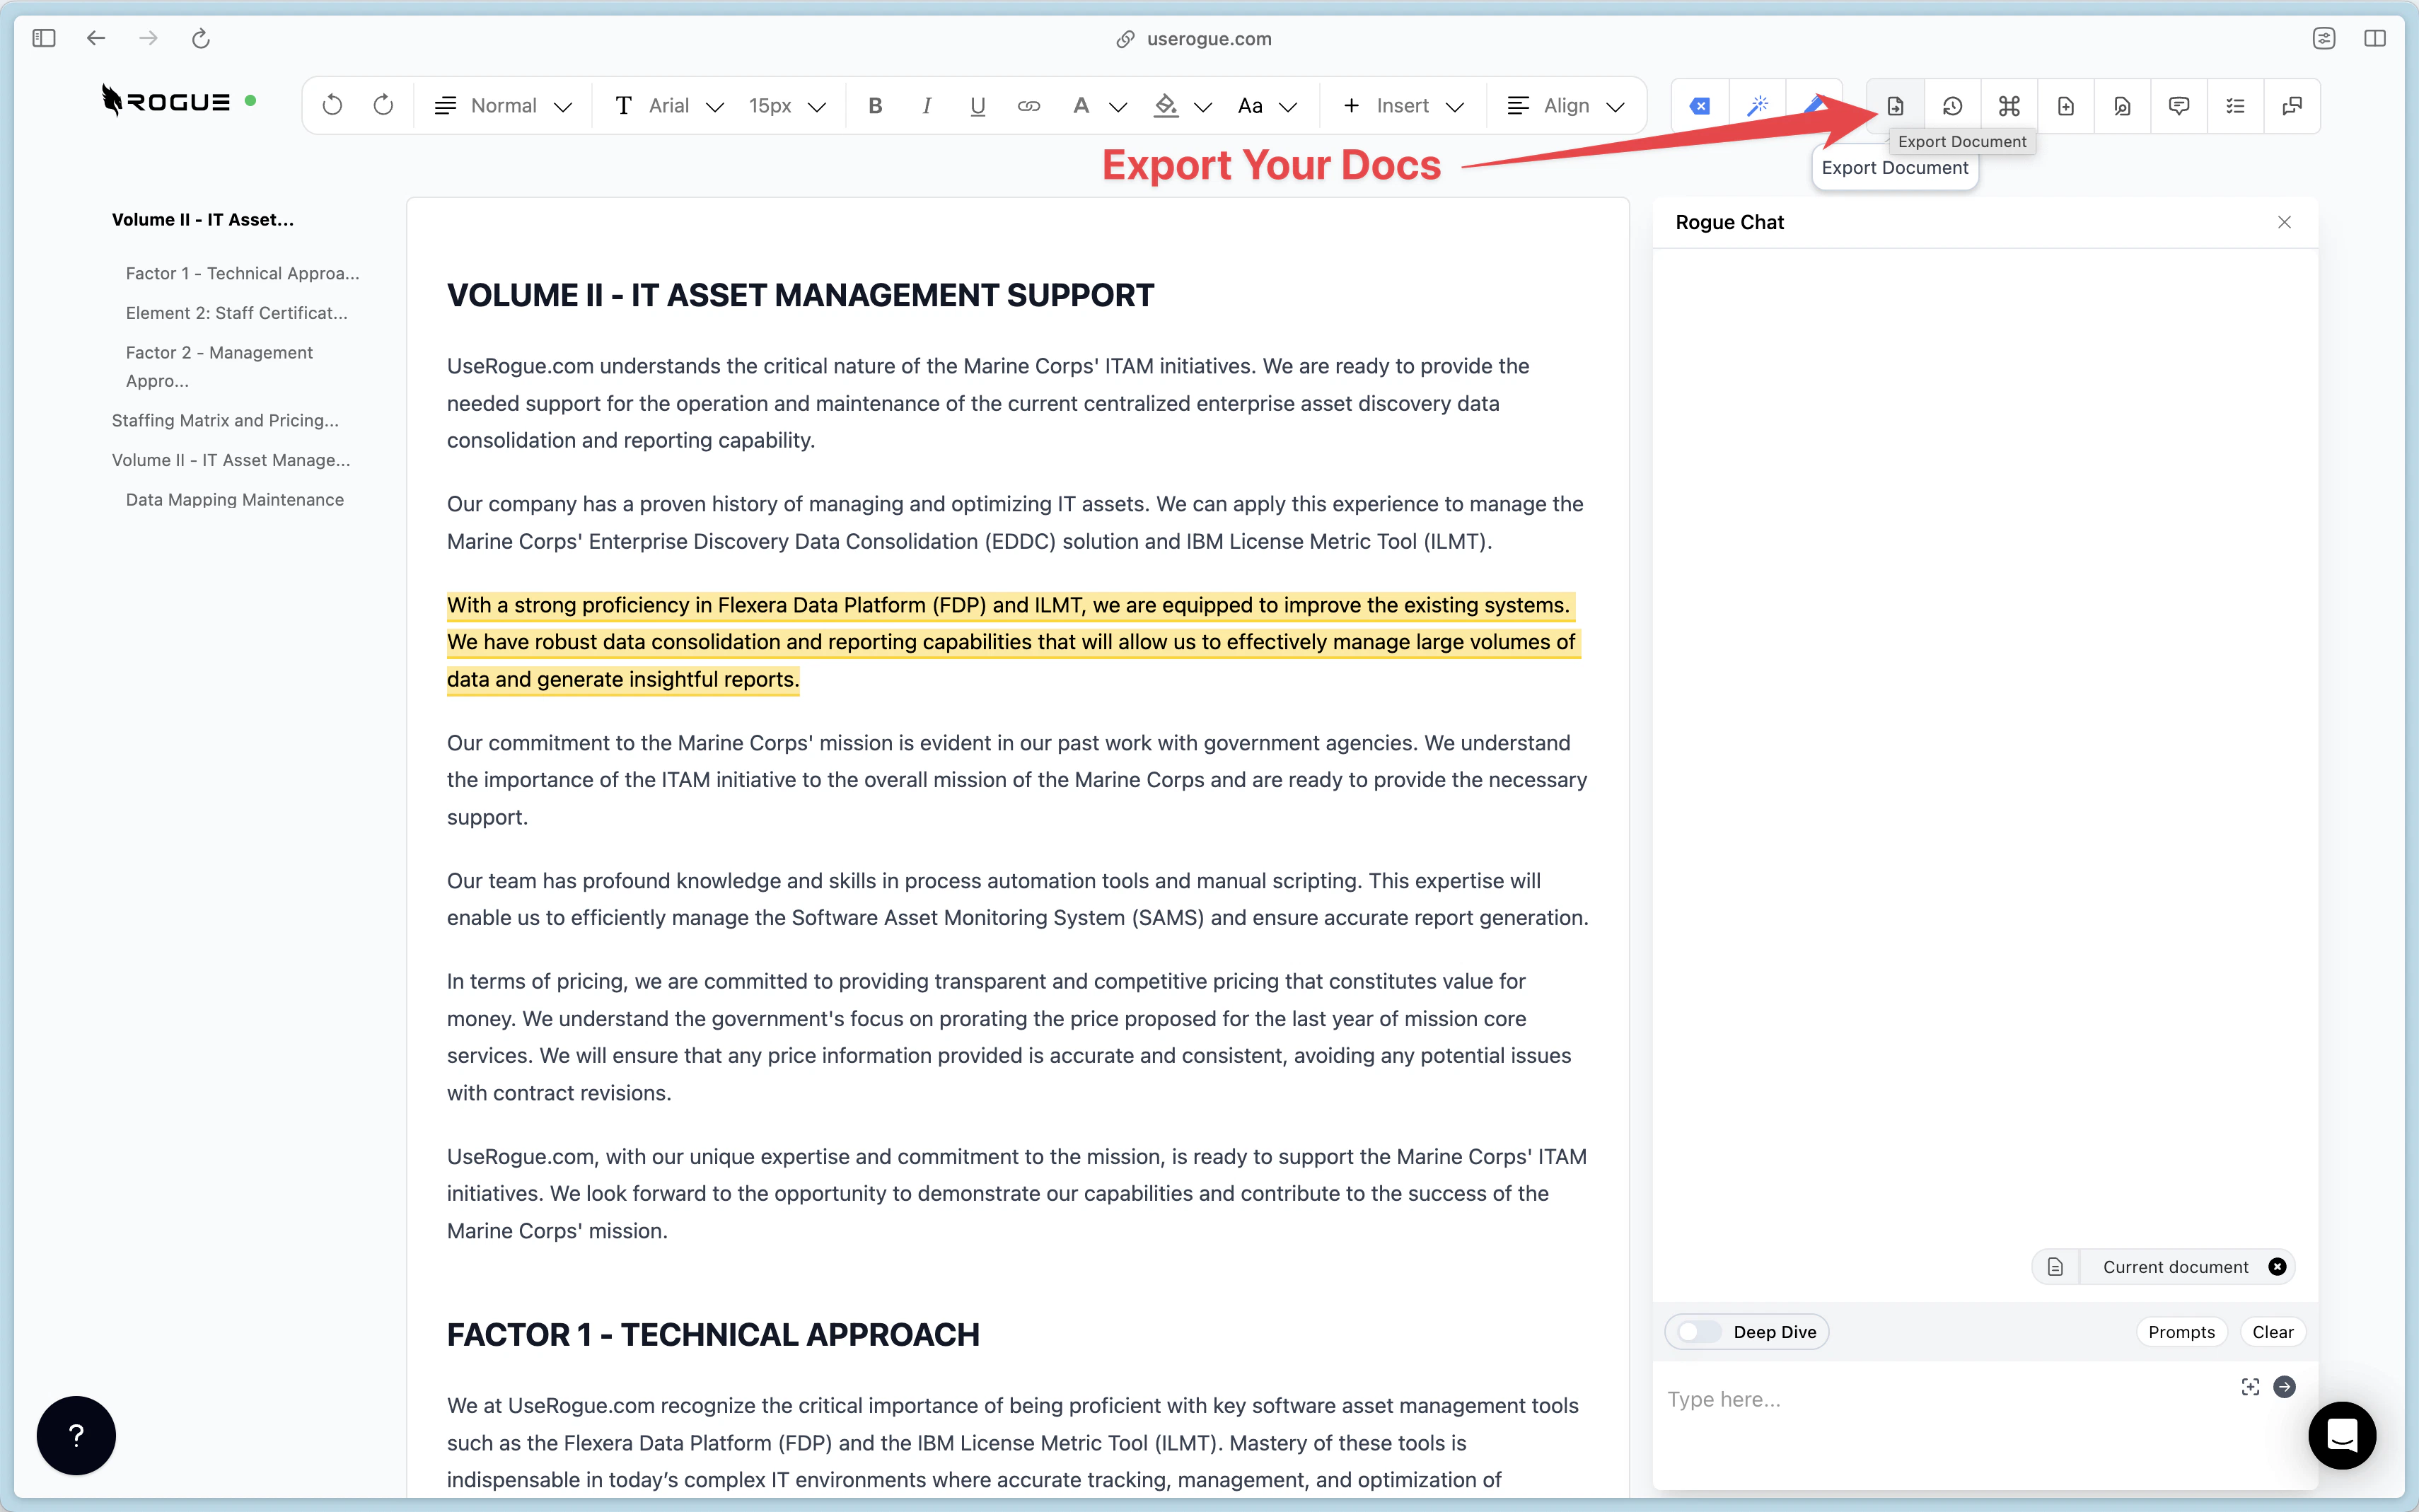 Selecting the export button will bring up the export menu.
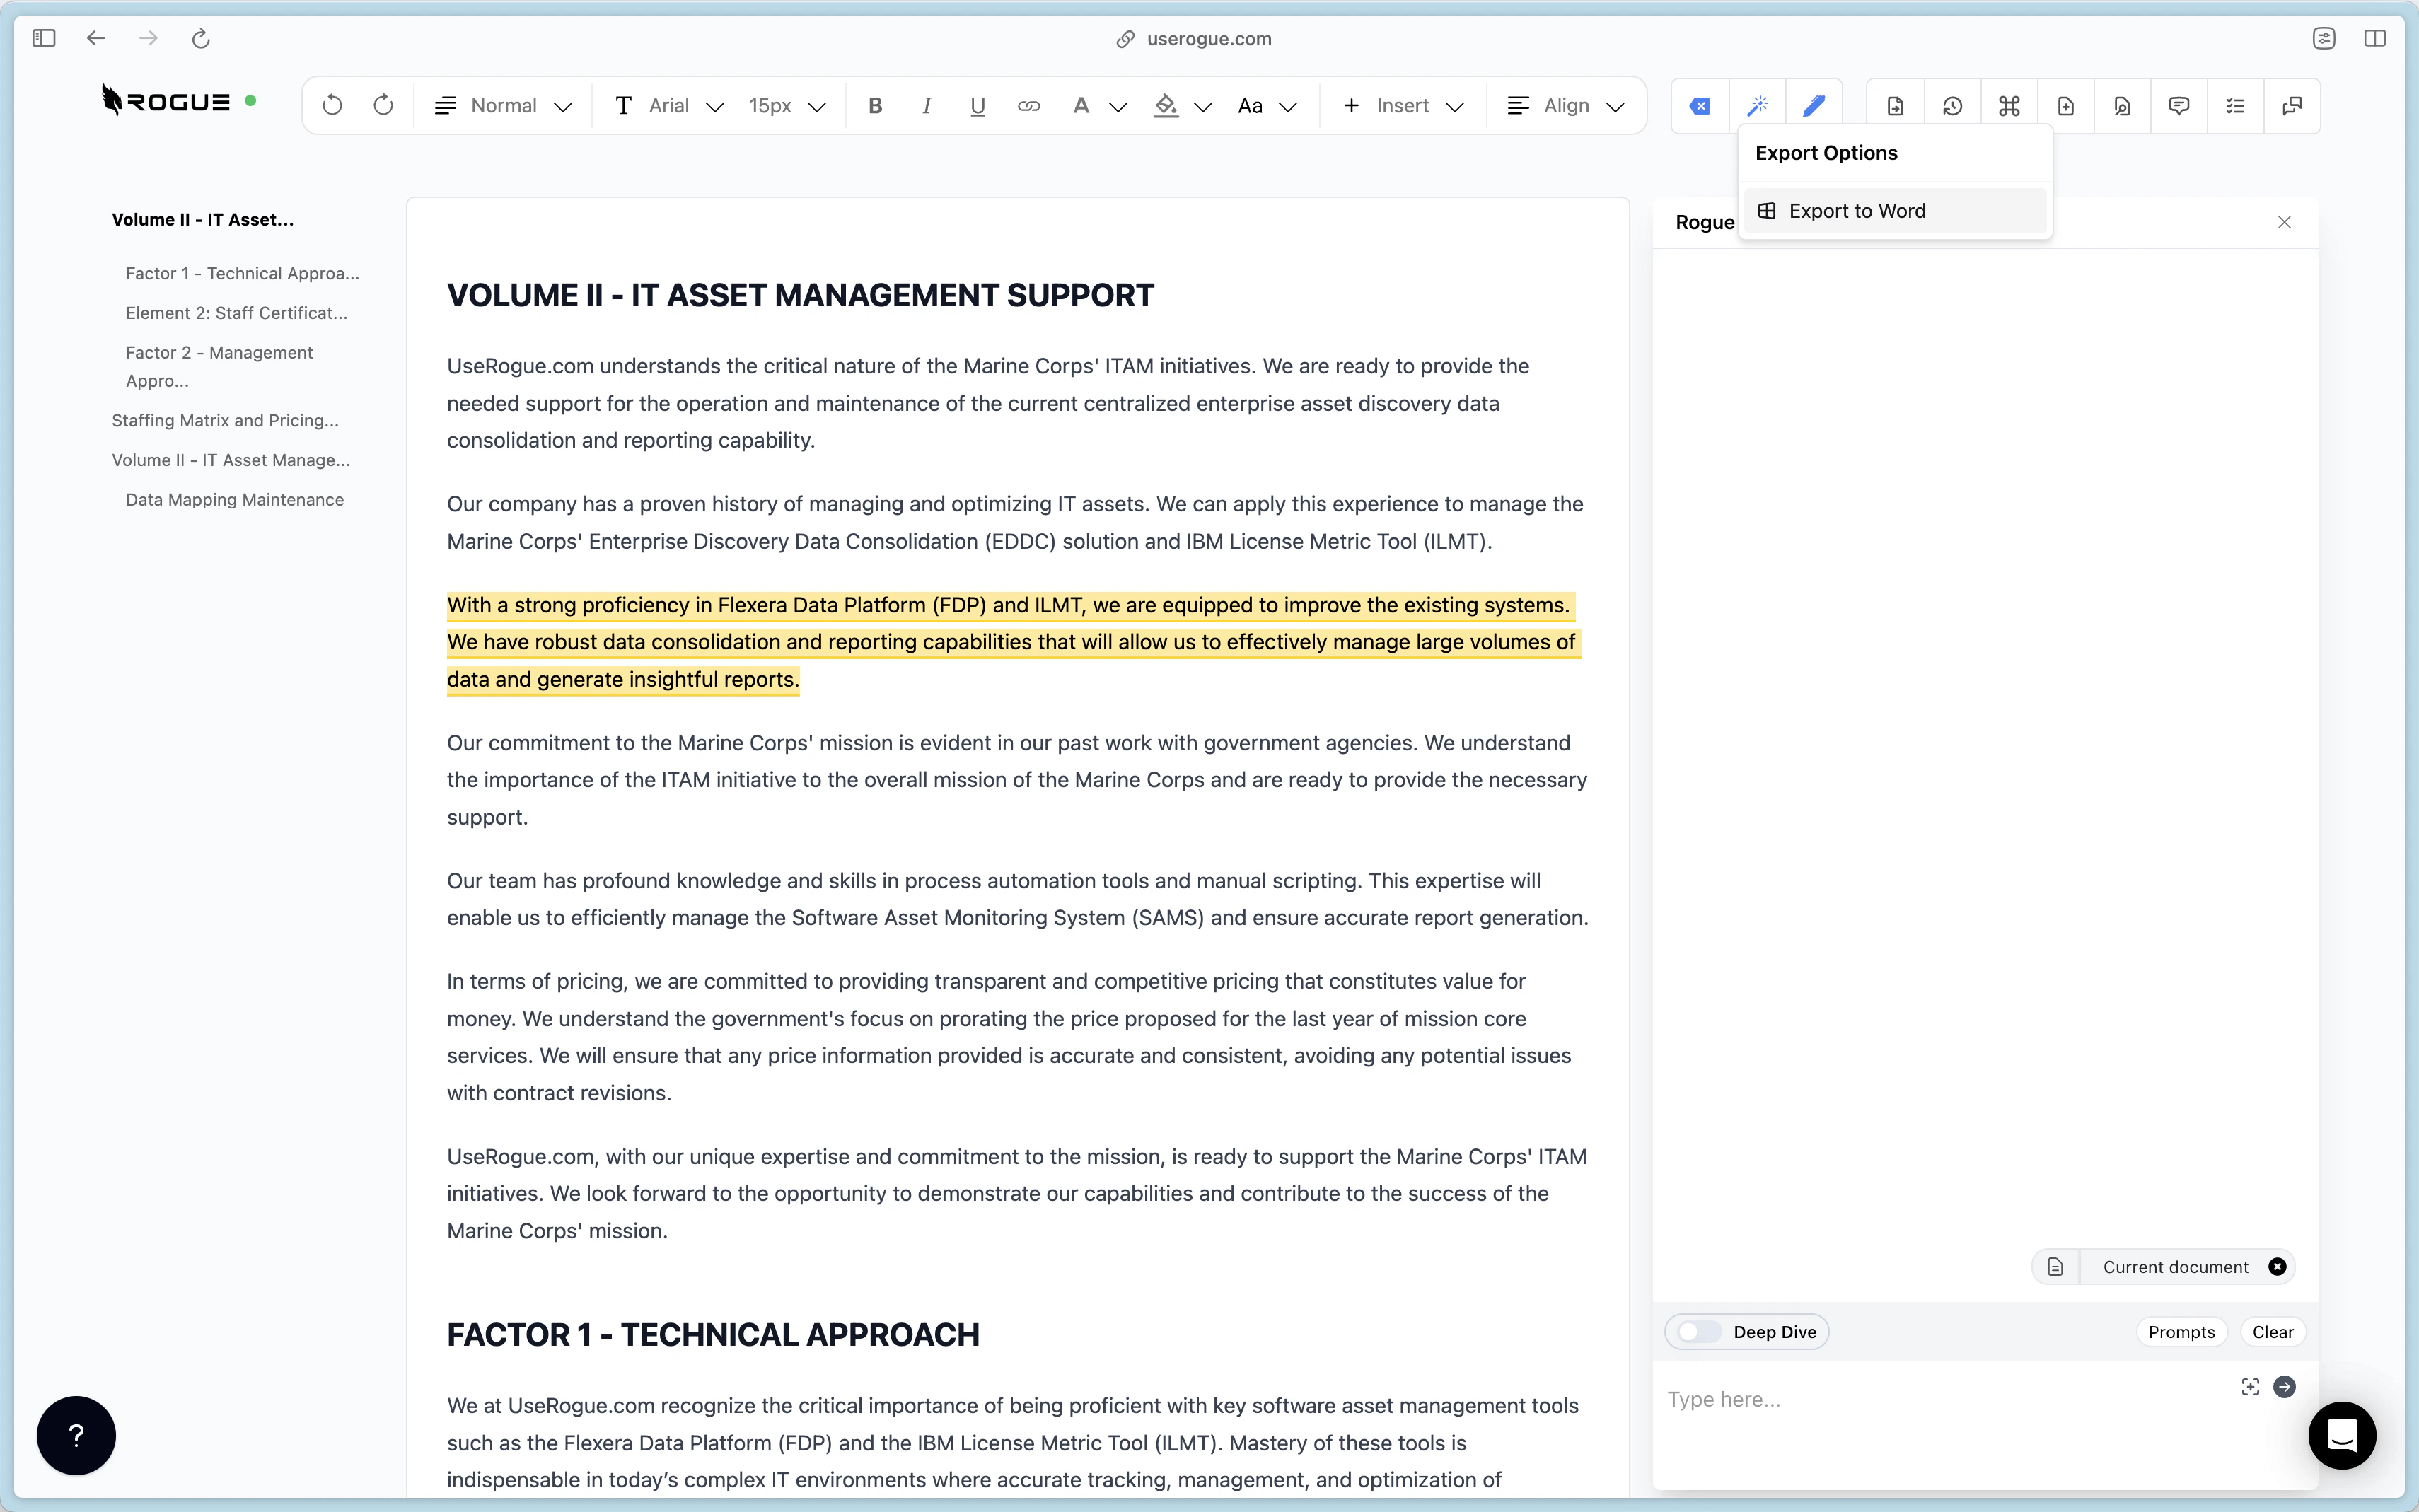 Once you select the export the file will download in MS Word format.
## Version History
You can view the version history of your document by selecting the version history button on the top right tool bar.
Once you select the export the file will download in MS Word format.
## Version History
You can view the version history of your document by selecting the version history button on the top right tool bar.
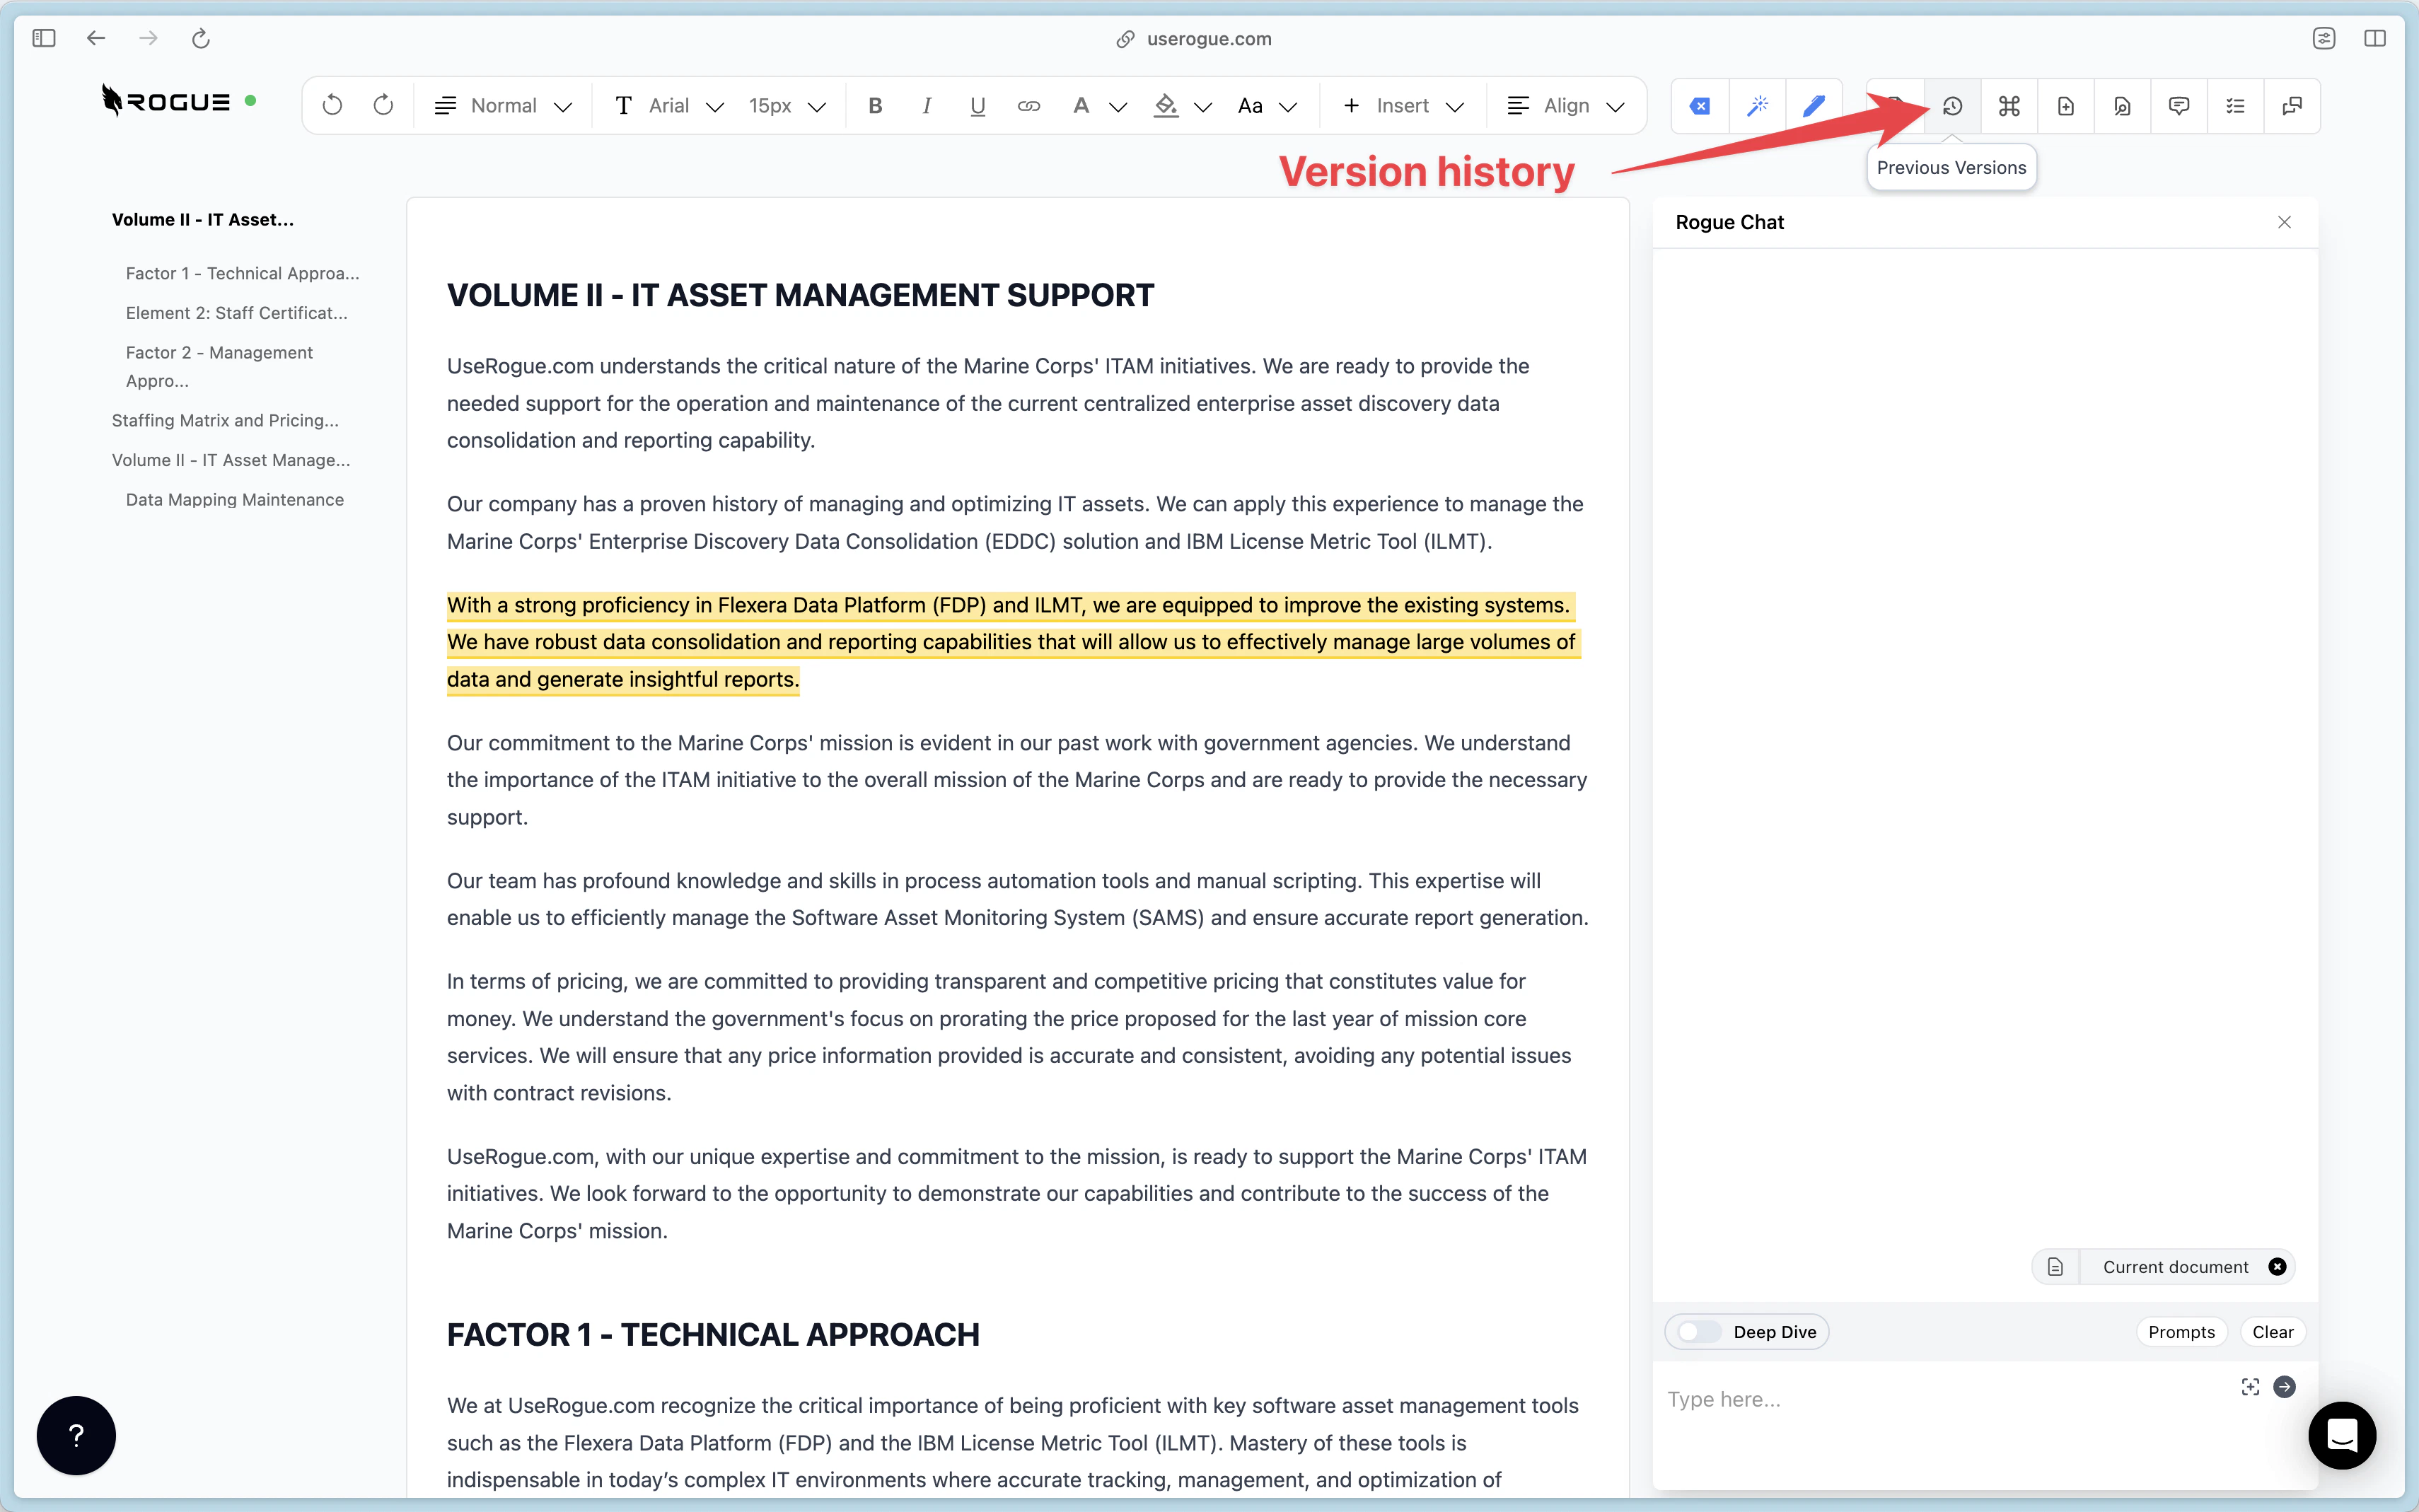 Selecting the version history button will bring up the version history menu on the right sidebar.
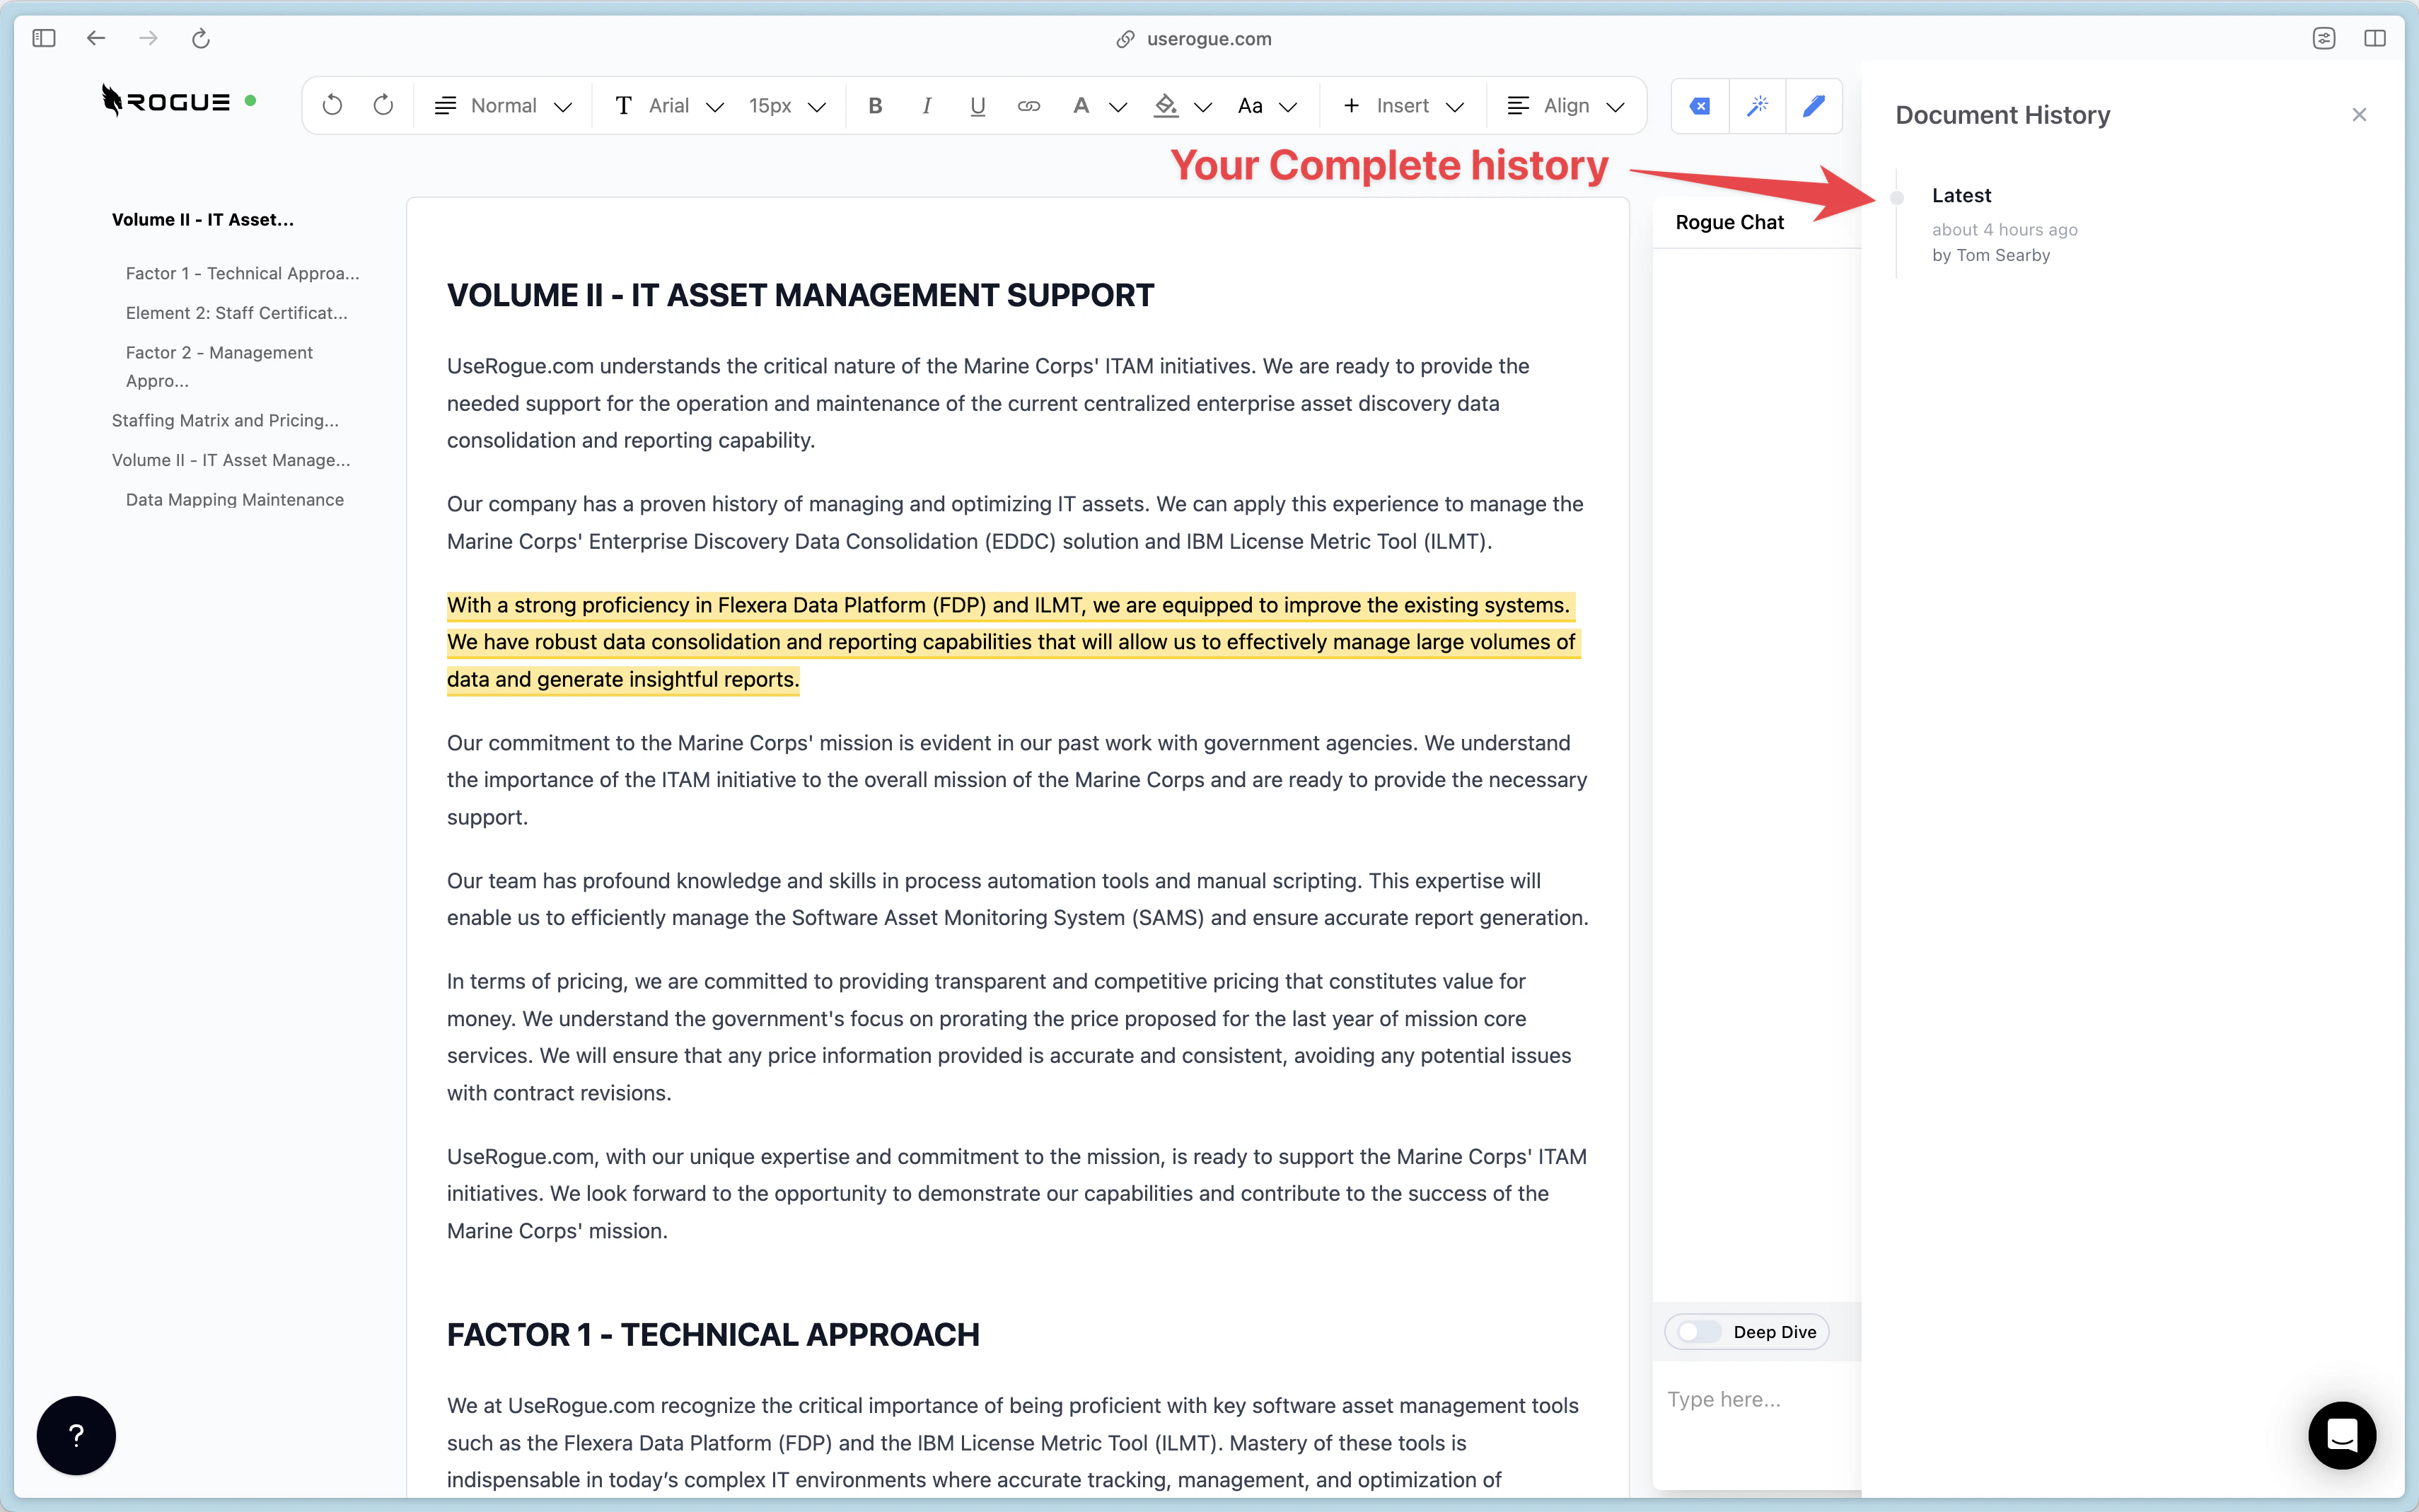 You can then select a version to view it.
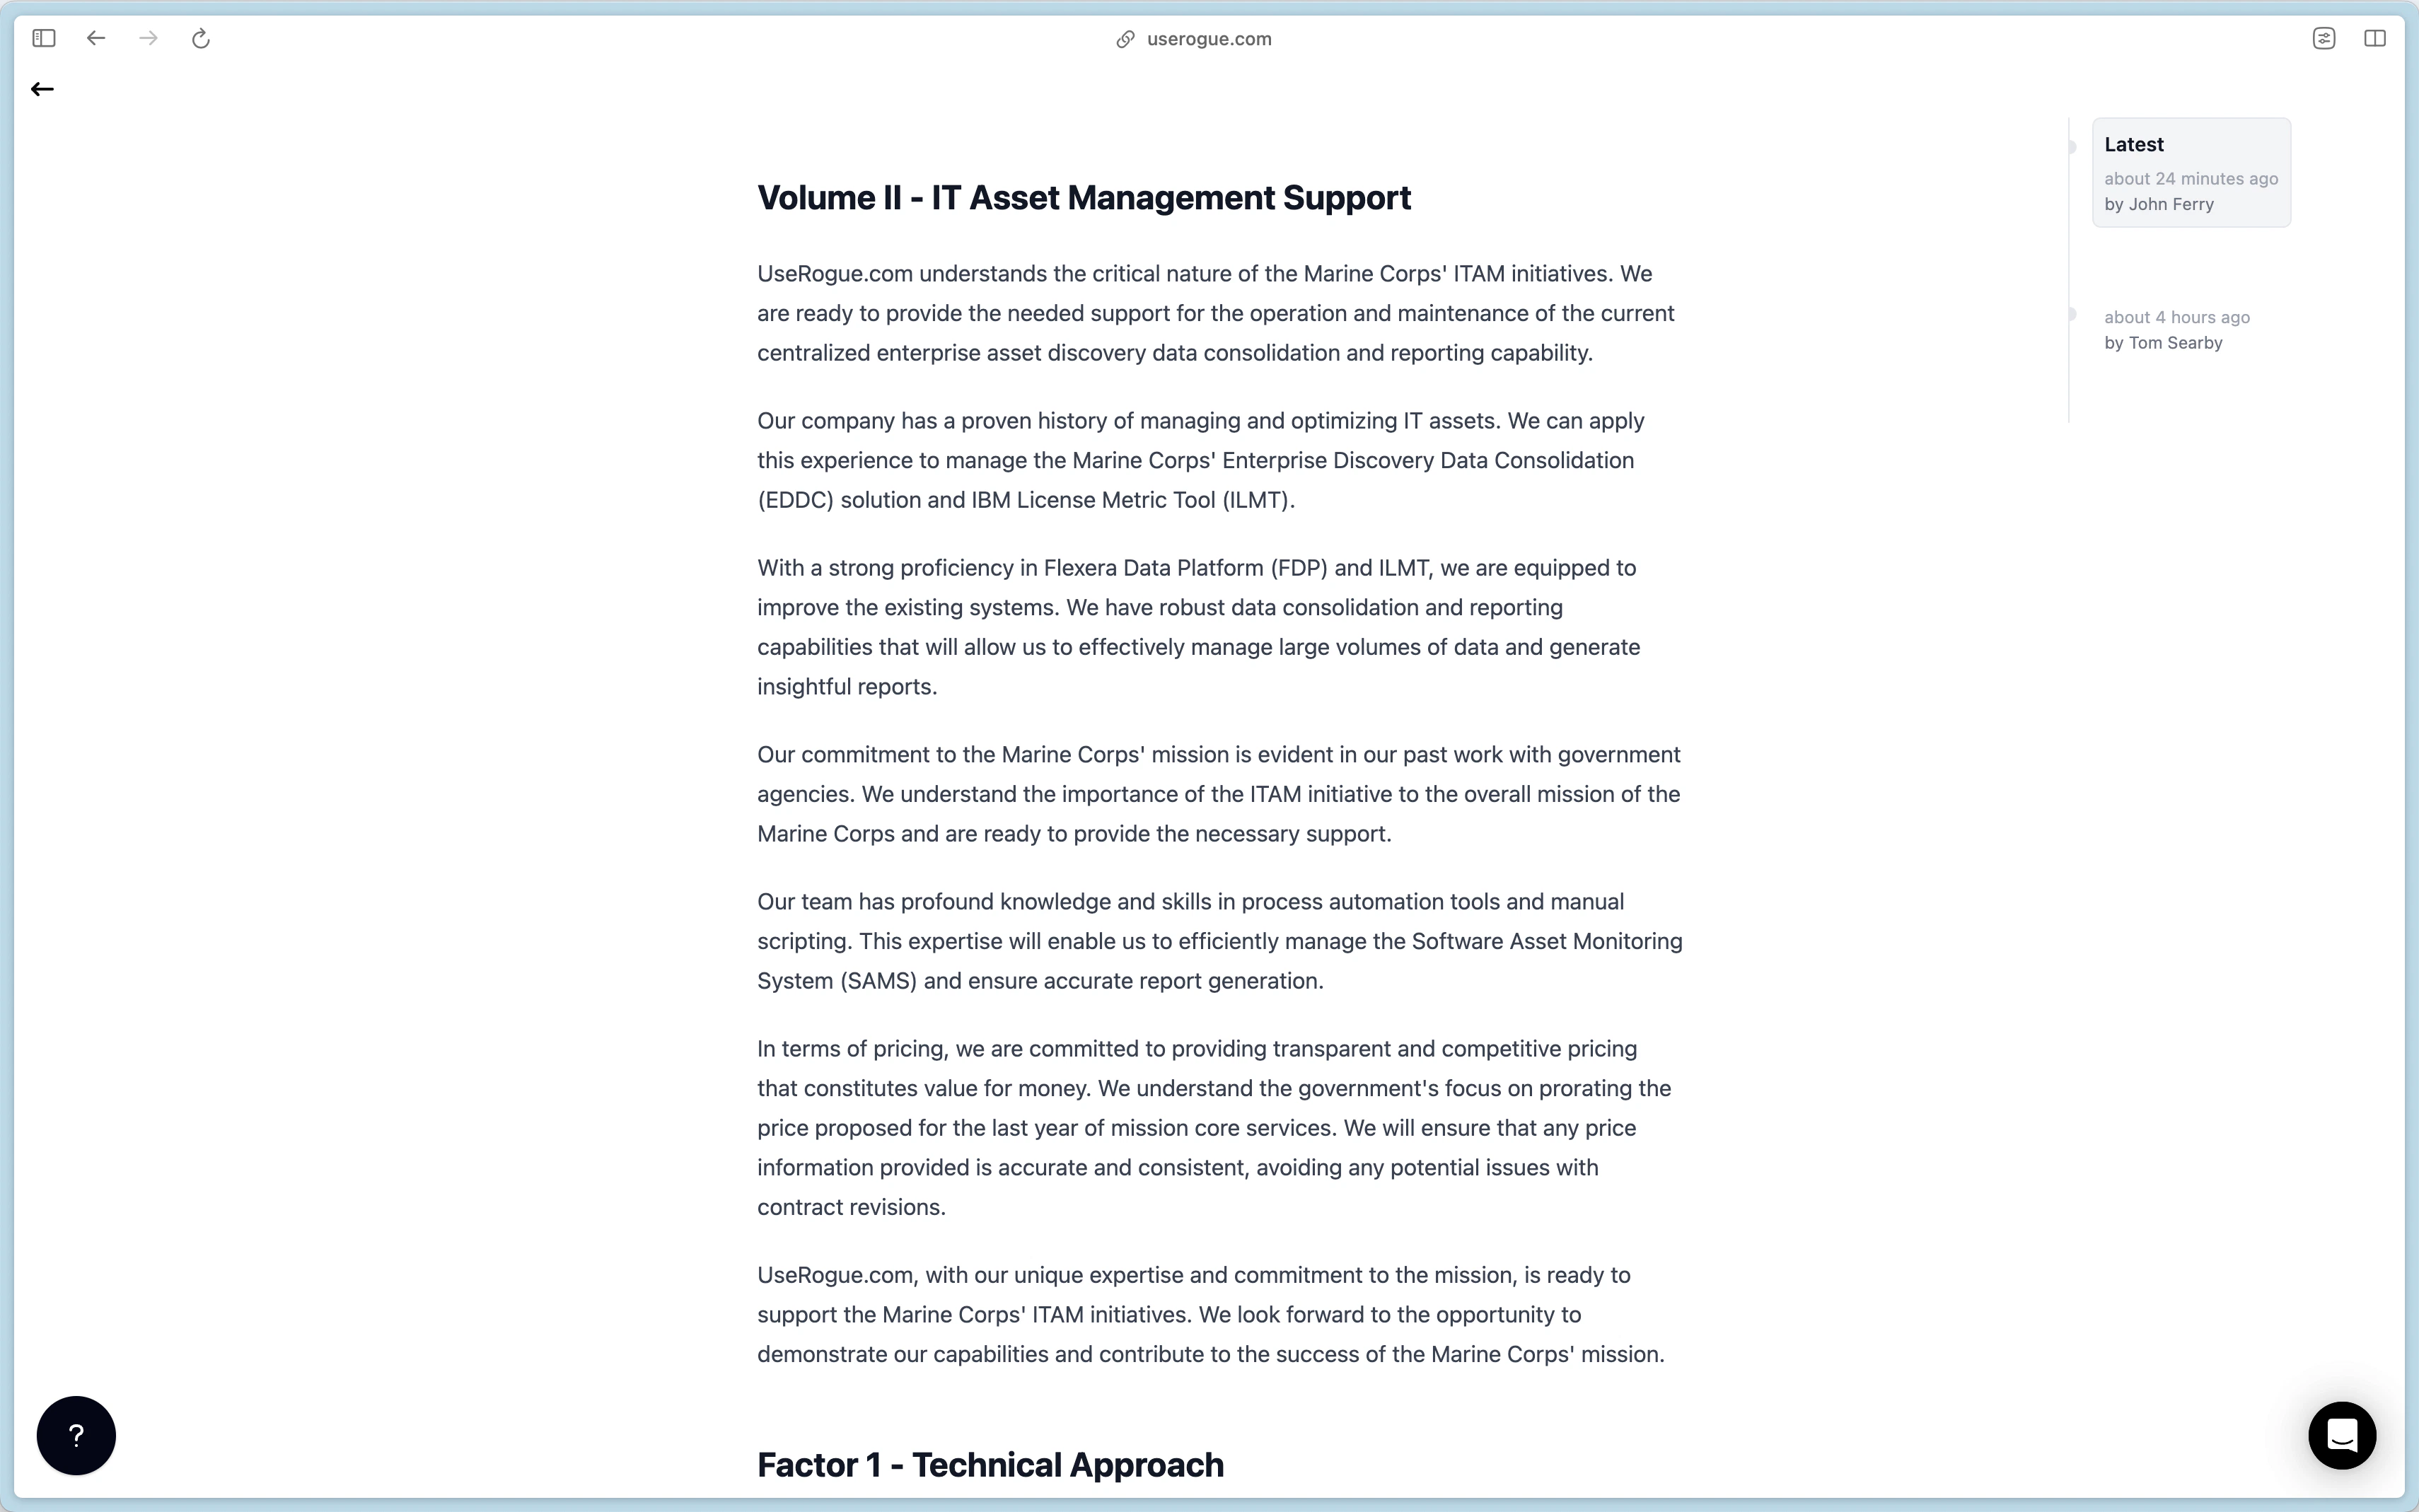 You can see the previous version and rollback to the previous version.